AutoCount e-Invoice Setting
5. MyTax Preprod Register
This guide is for the test environment only. It lets users explore system features safely without affecting live data, before moving on to the production system
1) Link for MyTax Preprod (For Sandbox/Testing): https://preprod-mytax.hasil.gov.my/
*Interface might differ slightly as this guide is based on Sandbox environment

2) Select ID Type & key in your ID & click “Submit”

3) It will prompt you that your “Digital Certification not exist”. Click “MyInvois” button to proceed

4) It will prompt you for Information Verification to verify your current email. Click “Yes” if the email is correct

5) Click “Submit” to submit your first-time login application

6) After clicking submit, a PIN No registration will be sent to the specific email

7) Login into your email, you will find an email from IRBM to activate your login. Click on the activation link

8) It will open a webpage and ask you to key in ID Type & ID again. Click “Submit” after done

9) You’re then required to create your password for this login. Key in your password & security phase

Tick “I agree” for the terms & conditions section and finally click “Submit”

10) After a few seconds, a success message will appear. Click “OK” to proceed

11) It will prompt you back to the main login. You may login again

12) It will display the front page of MyTax Portal after login

5.2 Link to Your Company
1) You will need to link your company to your profile.
Click on the User icon (1) > Role Application (2)

2) New Company Application Submission

| a) | Choose “New Application” |
| b) | For role choose “Director of the Company” for SDN BHD & “Business Owner” for Sole Proprietorship, Enterprise or Partnership |
| c) | Key in your company TIN number (number only) |
| d) | Upload supporting document like SSM Certificate |
*If you are not able to select Business Owner, kindly consult LHDN for further actions
3) It will prompt you to key in your password again. Then click “Signature”

4) A success message will appear & you can now proceed to access your company

5) Go back to MyTax home page & you will then be able to access your company from there

Click here & link to your company name

6) After linking your company, go to MyInvois Preprod & setup your company / taxpayer profile

7) On the self-registration page, scroll down, agree to the terms, & click Continue
If the page doesn’t show up, wait a bit as it might not be live on the MyInvois Preprod yet

8) Check your taxpayer profile details, key in any blank mandatory fields if required. Click “Save” once done

9) Next will be your user profile, key in your email & click “Save”

10) Lastly, it will show you a registration complete page. Click “Finish Setup” to proceed

11) You will then be directed to your company MyInvois Portal / Preprod page

5.3 Add AutoCount as Intermediaries
This is to set your company allowing AutoCount to submit on behalf for your company e-Invoices
1) Access MyInvois > Preprod. Please make sure you are in your company profile to do this.
2) At MyInvois Preprod, click “VIEW TAPAYER PROFILE” if taxpayer profile is your name
*For first time login, just go through some first time setup steps lile agreeing Terms & Conditions and verify profile info

3) At the Taxpayer profile, scroll to the botom. There is a table for you to add Intermediaries.
Click on the “Add Intermediary”

4) Key in your intermediary TIN, BRN & Name. You may key in AutoCount’s info here:
- TIN: C20239710060
- BRN: 200601031841
- Name: AXXX_XXXXHD
After that, click “Search” (1) > Continue (2)

5) You can set the effective date & permission for the intermediaries. Save it when done.

You can now setup your own company account book in AutoCount & submit e-Invoice
5.4 Register & Manage ERP
This is to set your company allowing AutoCount to submit on behalf for your company e-Invoices
5.4.1 View & Register ERP
1) Access to MyInvois > Preprod. Please make sure you are in your company profile to do this
2) At MyInvois Preprod, click on “VIEW TAXPAYER PROFILE” if taxpayer profile is your name
*For first time login, just go through some first-time setup steps like agree Terms & Conditions and verify profile info
3) At the Taxpayer profile, scroll to the bottom. There is a table for you to add ERP. Click “Register ERP”

4) A dialog will appear. Add input details & register.
Type in ERP Name & choose the Client Secret Expiration “3 Years”, then click “Register”
The Primary ERP system is the main ERP system for the Company

5) It will then prompt a dialog to show your Client ID & Client Secret
Please copy this & save for your own storage, this will be needed to key in AutoCount later for validation. Then click ‘Done’ after you had copied.

Your ERP table should also be updated with the name you provide just now

5.4.2 Manage ERP
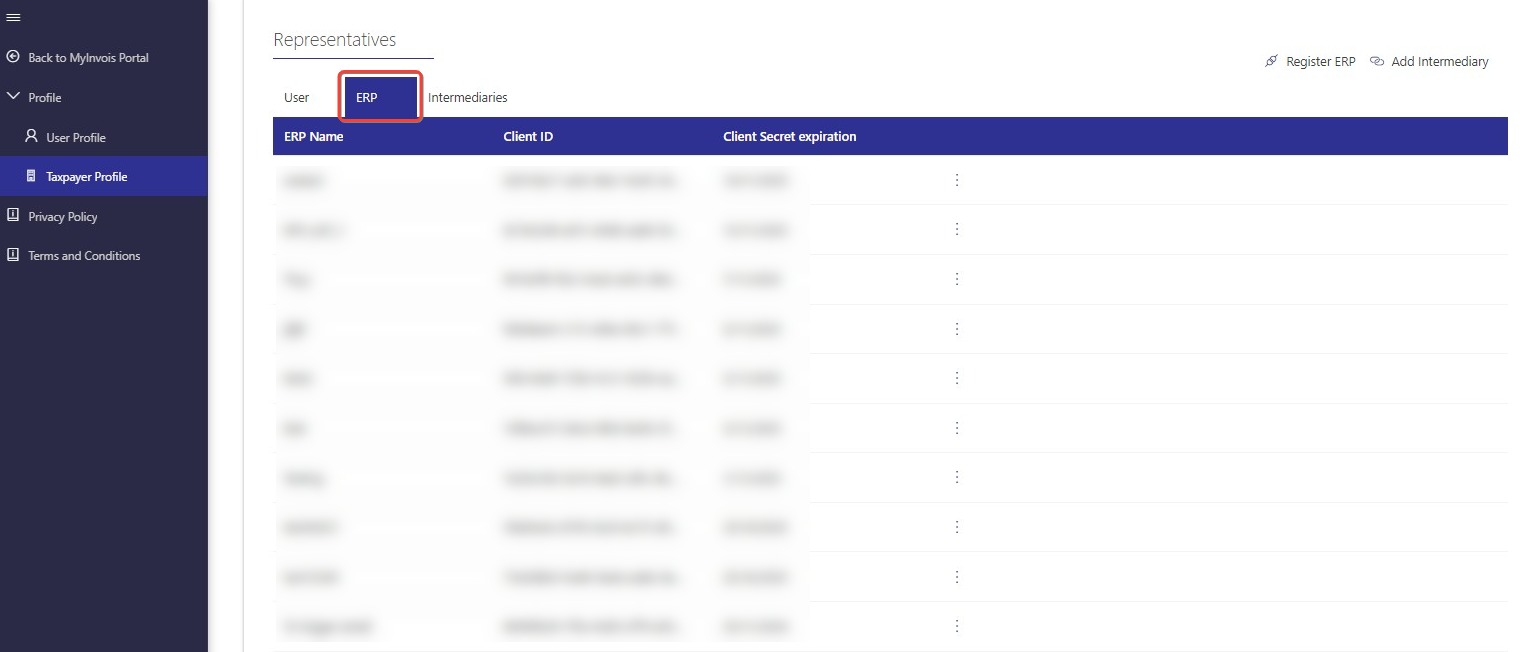
1) Access the Taxpayer Profile
At MyInvois Preprod, click “VIEW TAXPATER PROFILE” if taxpayer profile is your name
Scroll to the bottom, click “ERP” tab
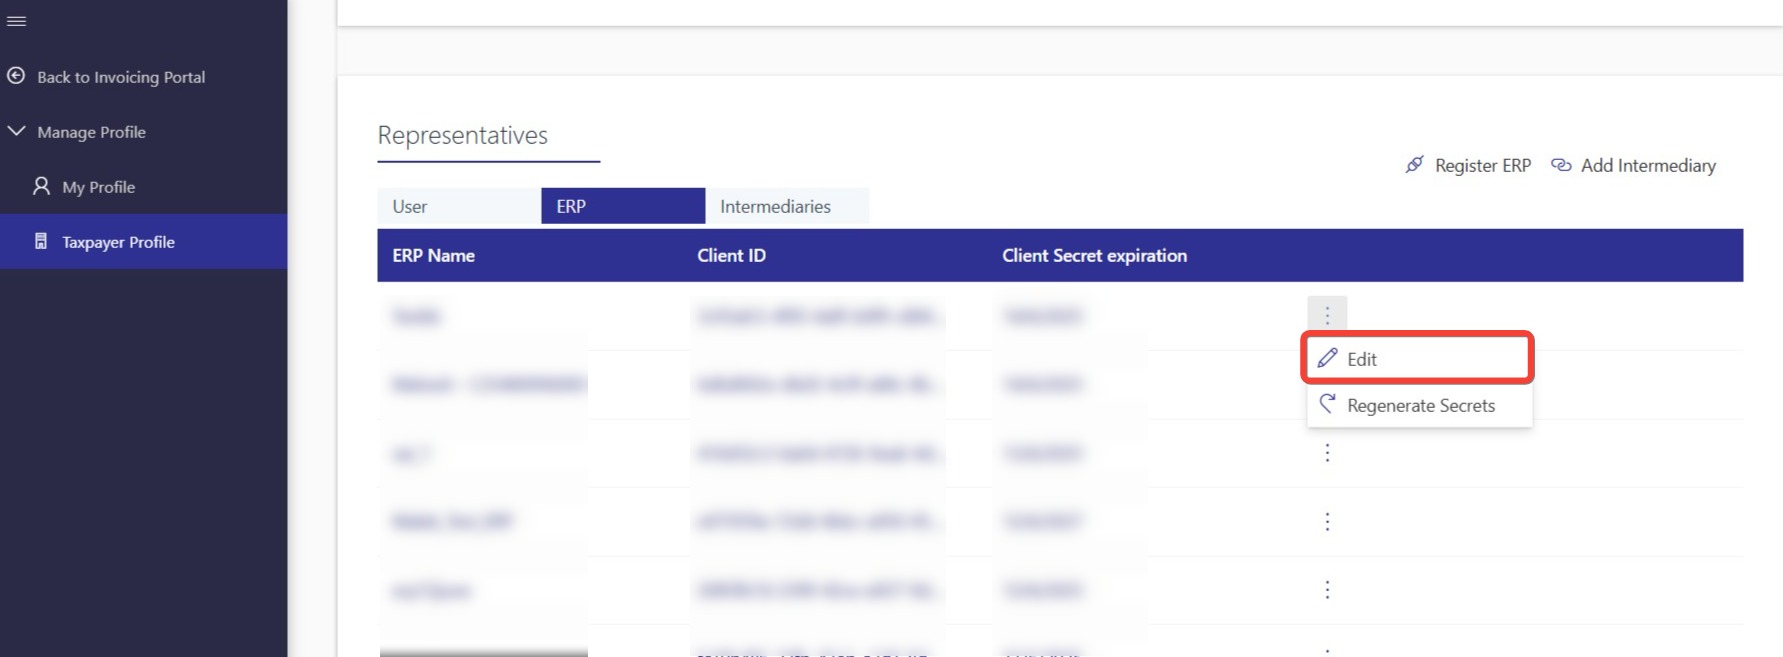
2) Edit ERP
On the ERP row you want to edit, click on more options (⋮), then select “EDIT”
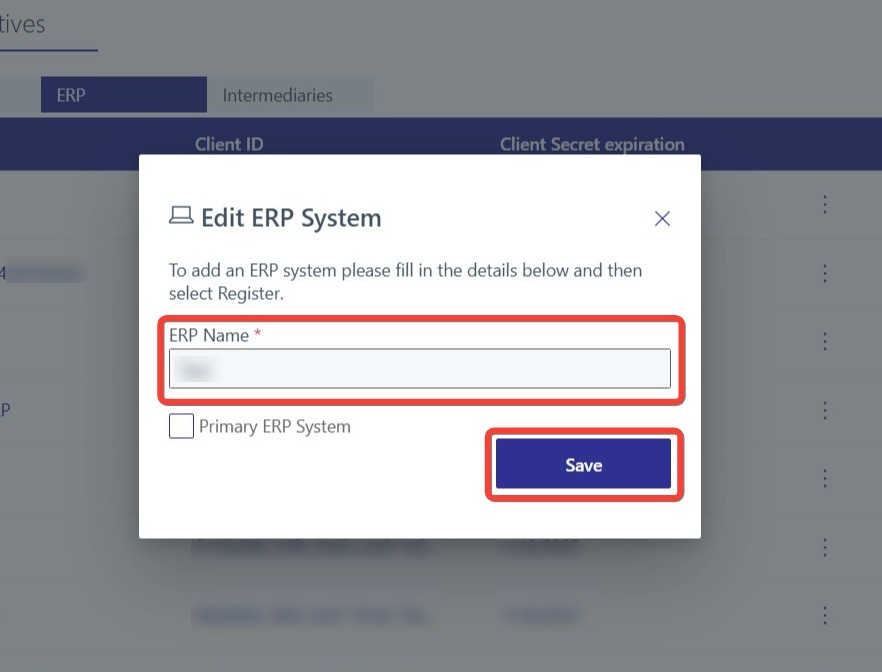
Update ERP Name & click SAVE
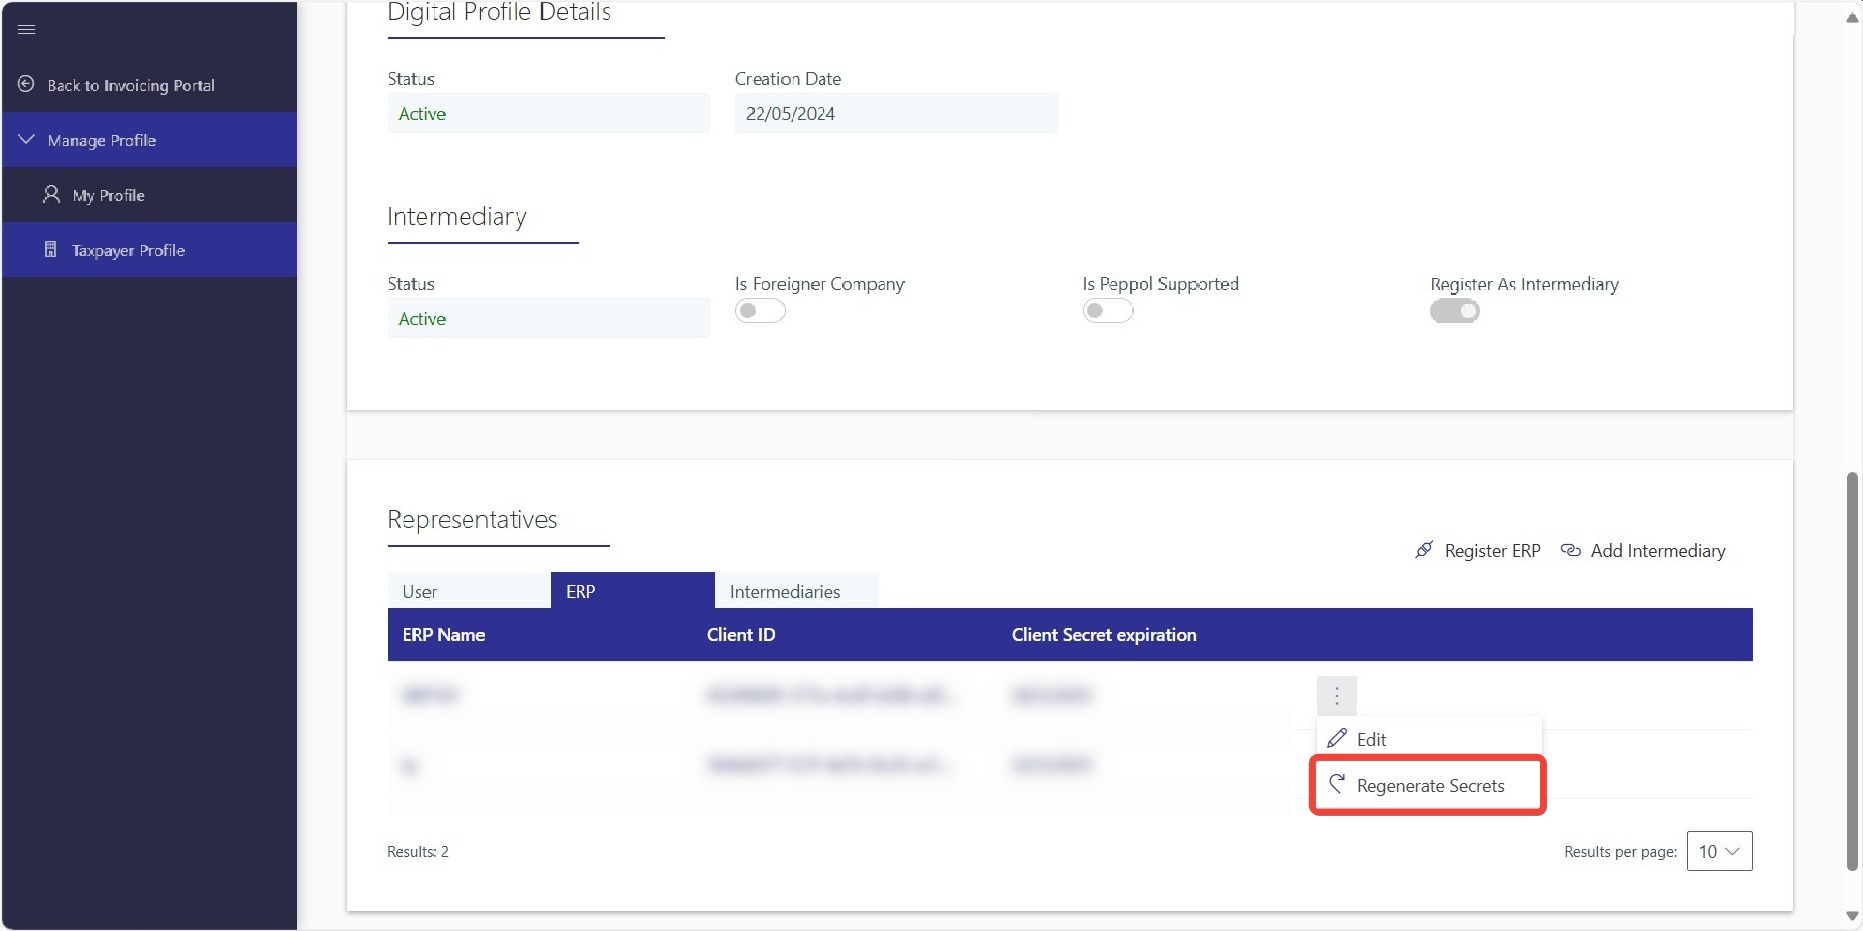
3) Regenerate Secrets
On the ERP row you edited, click on more options (⋮) again, click REGENERAT SECRETS
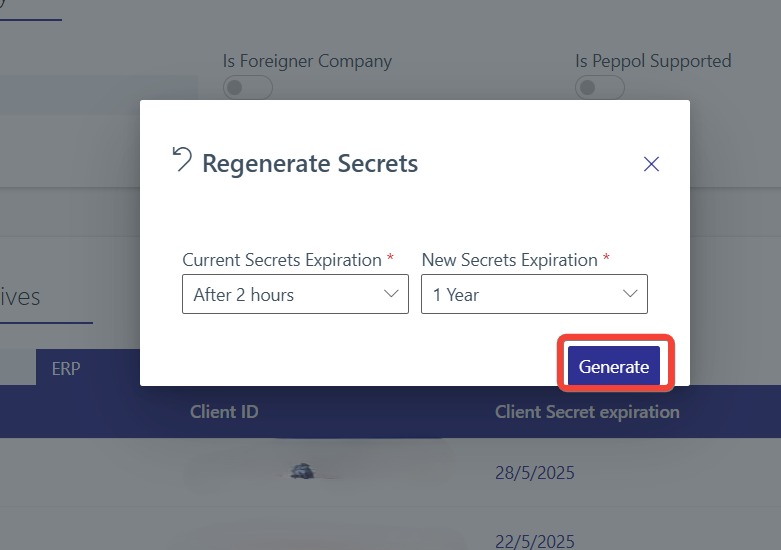
4) Configure Secrets Expiration & Generate
Define the options & click on GENERATE button
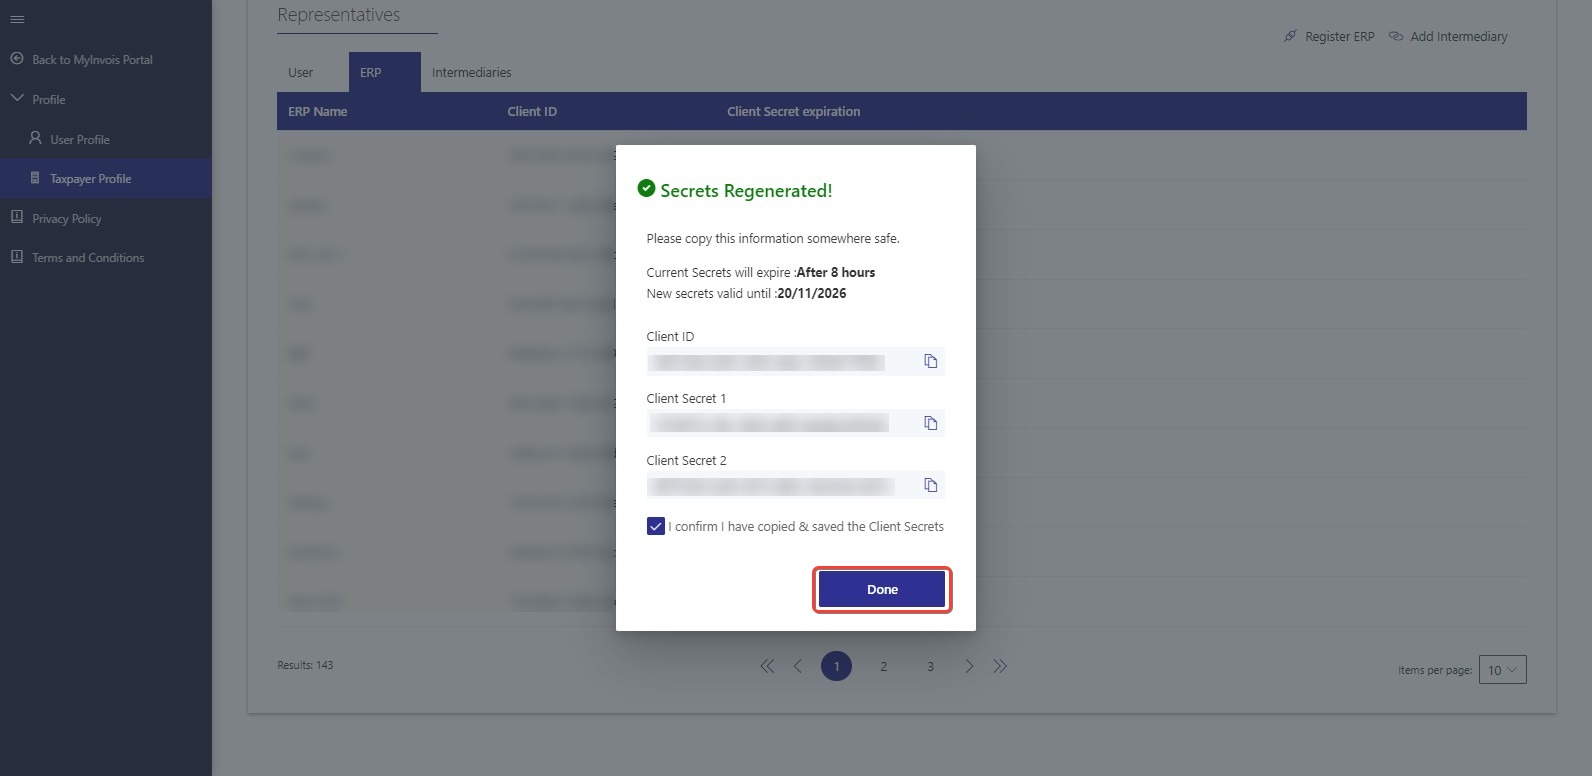
5) Save the New Secrets
Copy the new Client ID & Client Secrets displayed & check the box to confirm that you have copied, then click on Done button
5.4.3 AutoCount Setup
1) Login to your AutoCount Accounting (Version 2.2 Rev 27 & above) and go to e-Invoice menu > e-Invoice Setting

Tick on “Enable e-Invoice” to start your e-Invoice settings

2) A setting page will prompt and you can then tick on the “Enable e-Invoice” checkbox and set your Start Date for e-Invoice and click “OK”

3) Click “Activate e-Invoice on AIP Server”

4) Click “Click for add new TIN” to create your own company Tax Entity
*If your company already has a Tax Entity, it will display as “Click for update TIN”

5) Key in your company information into Tax Entity. Click “Save” after complete

6) Key in your Client ID & Client Secret that you had copied as STEP 6 and click “Activate

7) System will attempt to connect to MyInvois Preprod and if success, it will prompt you a success message.
Click “OK” on the prompted message

You can now use your AutoCount to submit e-Invoice
*If the system prompts another error message “License Portal Error: Unable to use e-Invoice License due to License ID not found.” Kindly contact your servicing agent
5.5 Add Representative (Optional)
This is to set your company allowing AutoCount to submit on behalf for your company e-Invoices
1) Login to MyTax website using director’s login
2) Access to your company by clicking on the Role Selection > Select your company

3) The profile will switch to your company.

4) To assign representatives:
Click on the right-side User icon (1) > Click Appointment of Representative (2) > Select ID Type (IC) (3)
Key in IC Number (4) > Click “Submit” (5)

5) It will prompt for your passowrd for confirmation. Key in your password and click “Signature” to proceed

6) After a few seconds, a success message will appear. Click “OK” to proceed

7) That IC / Individual login will then be able to access this company’s MyInvois Portal
5.6 Setting Permissions for Representative
1) Login to MyTax website using director’s login
2) Access to your company by clicking on the Role Selection > Select your company
3) You will notice the profile will switch to your company
4) Browse top MyInvois > Preprod to access your company MyInvois Preprod
5) At MyInvois Portal, click on your Taxpayer Profile
6) Make sure it shows your company profile. If not, you might need to click on the “Switch Taxpayer” to access the correct profile

7) Scroll to the bottom “Representative” section. You will see a list of representatives that you had added to access your company

8) On the person that you wish to set the permission, click o the triple dot button > Edit Permissions

9) A small window will appear. Click on the “Permissions” and set your permissions accordingly.
Remember to click “Save” after you assign all the required permissions
