Chapter 3 AutoCount V2 Function & Setting
3.1 Access Right
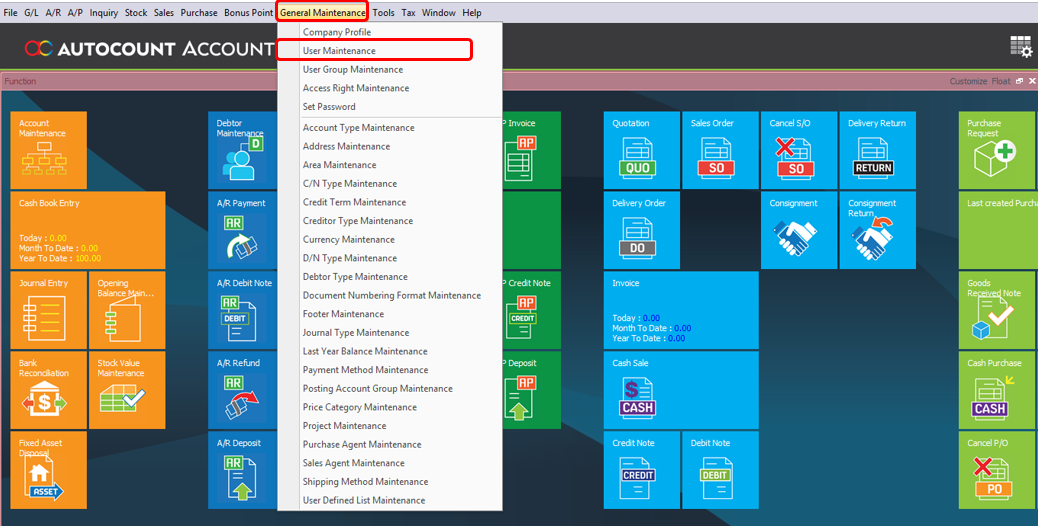
Go to General Maintenance > User Maintenance
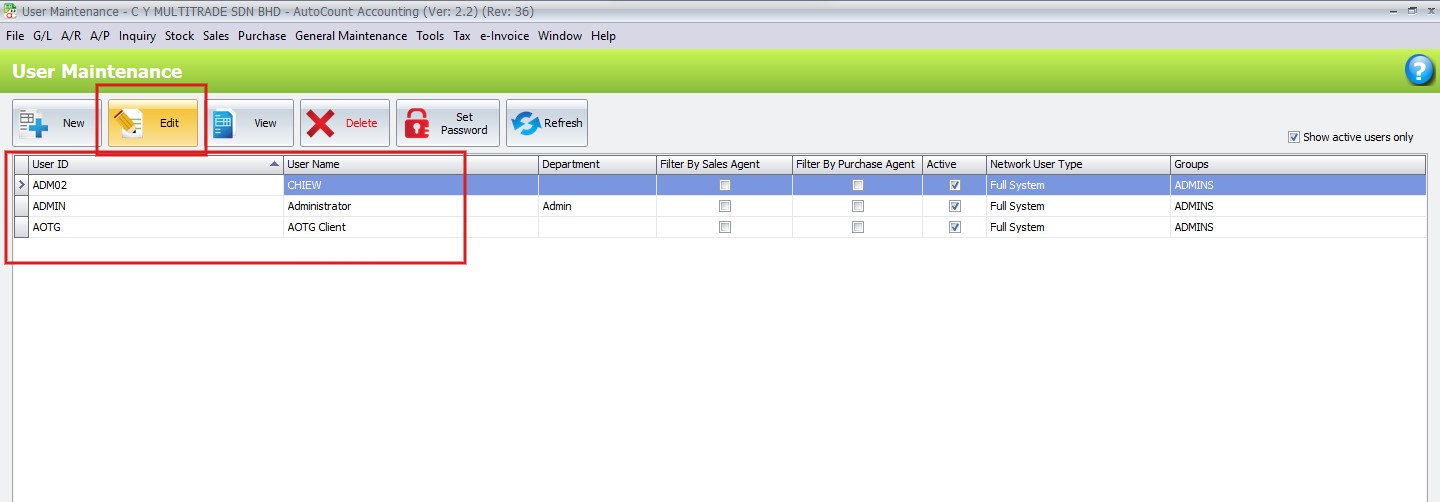
Select a User ID and click Edit
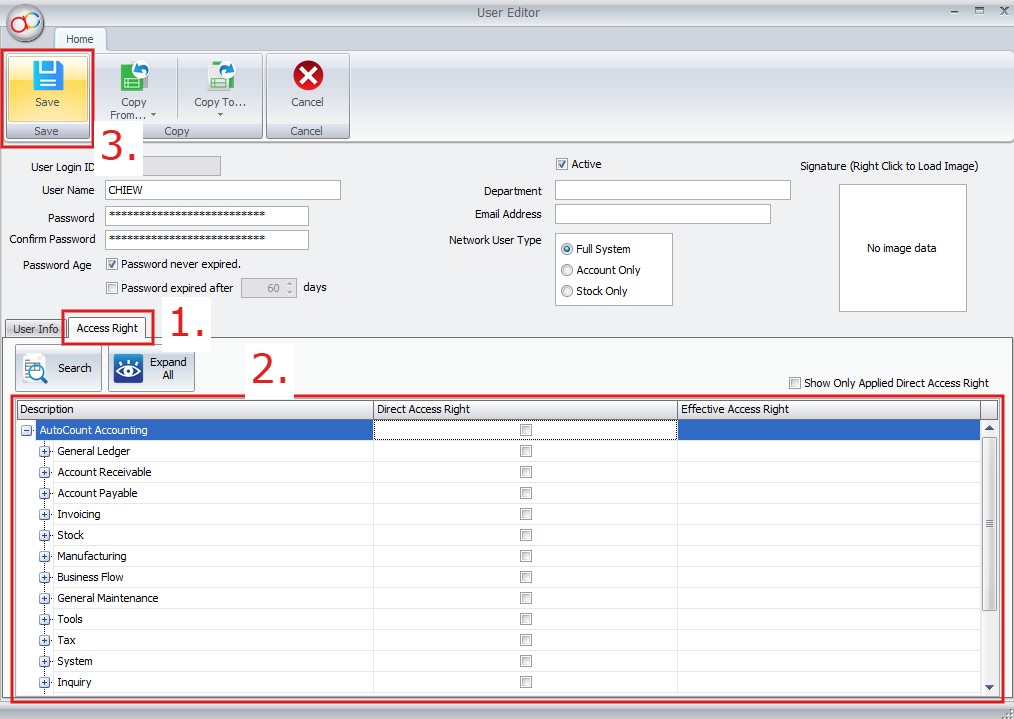
Go to Access Right (1) > Tick the tick box that you want to give the access right (2) > Click Save (3)
3.2 Windows Interface
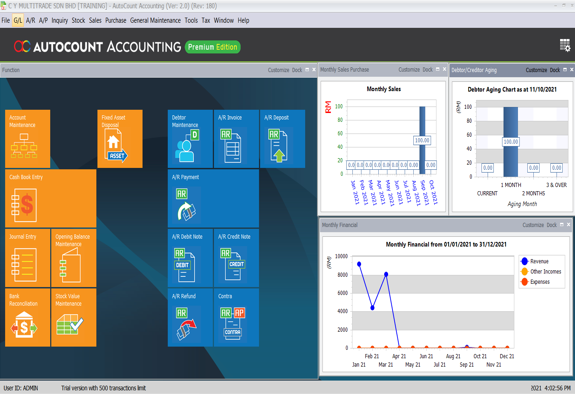
AutoCount Accounting 2.0 has a very powerful home screen which can be used as a tool for data tracking. It is always important to keep track of your own company business data and performance to know the current situation of your company and can be used as a reference for further decisions and actions in the future.
Main Features of Home Screen:
- Customizable home screen to suit individual’s preference
- Import and Export function to share your customized home screen design
- TIles and tablet-like design to support touch screen devices
- Multi-functional tiles for better user experience in
- Widgets including charts and graphs to show summarized information
- Drill-down function on charts and graphs for further insight analysis of data
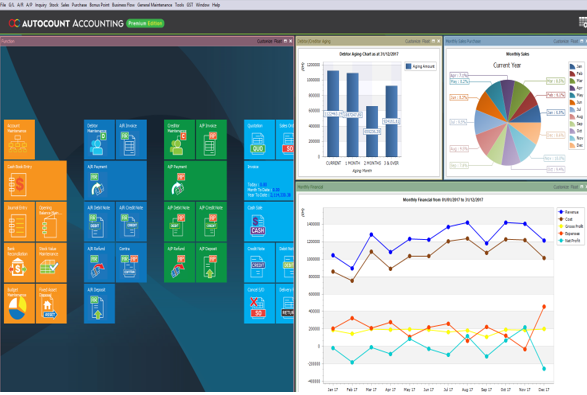
Below are Customized Home Screen with Widgets:
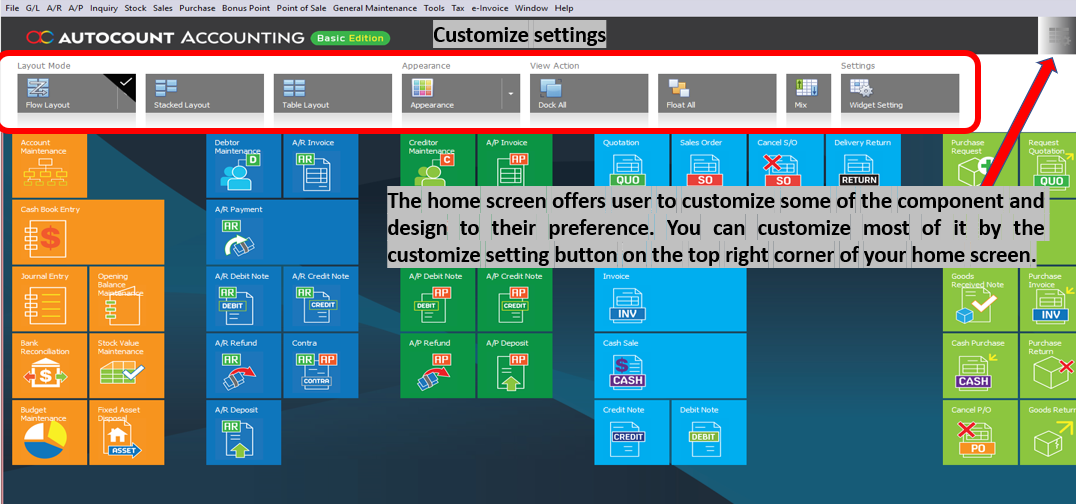
Customized Settings:
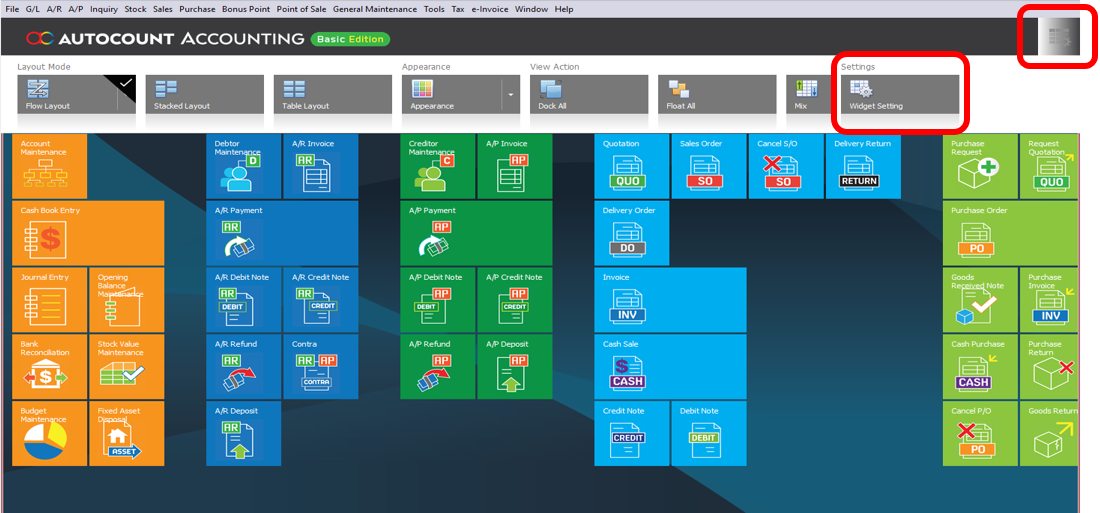
3.3 Widgets
Go to Main Page → Right Top → Setting → Widget Setting
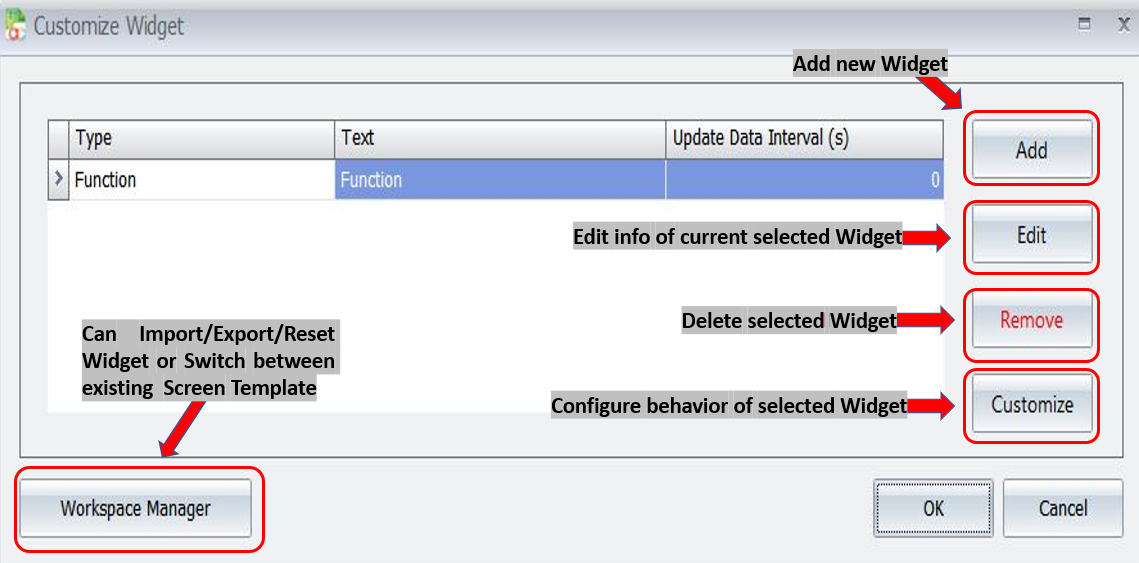
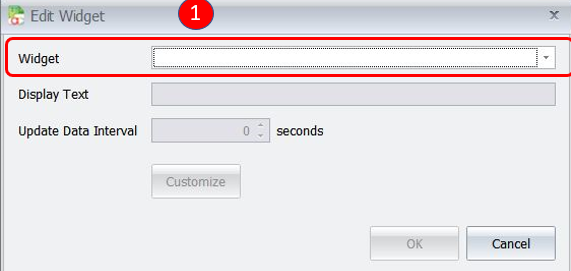
Adding Widget: First, click on the drop down menu button
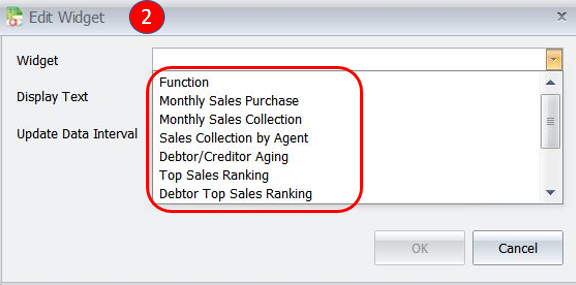
Select a widget to add
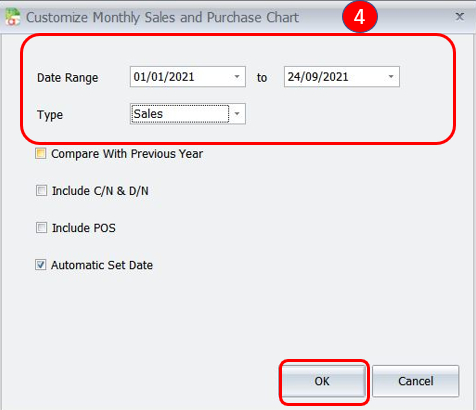
Click Customize
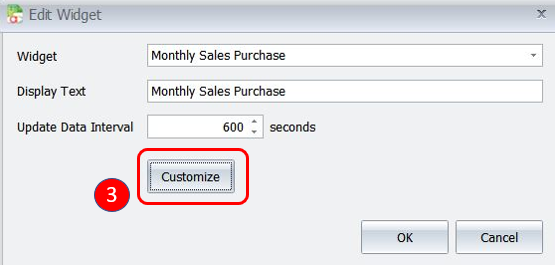
Can set a date range and type, then click OK
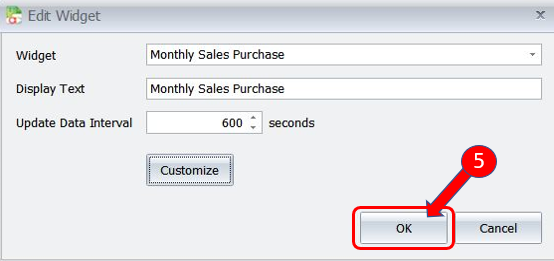
Click OK again
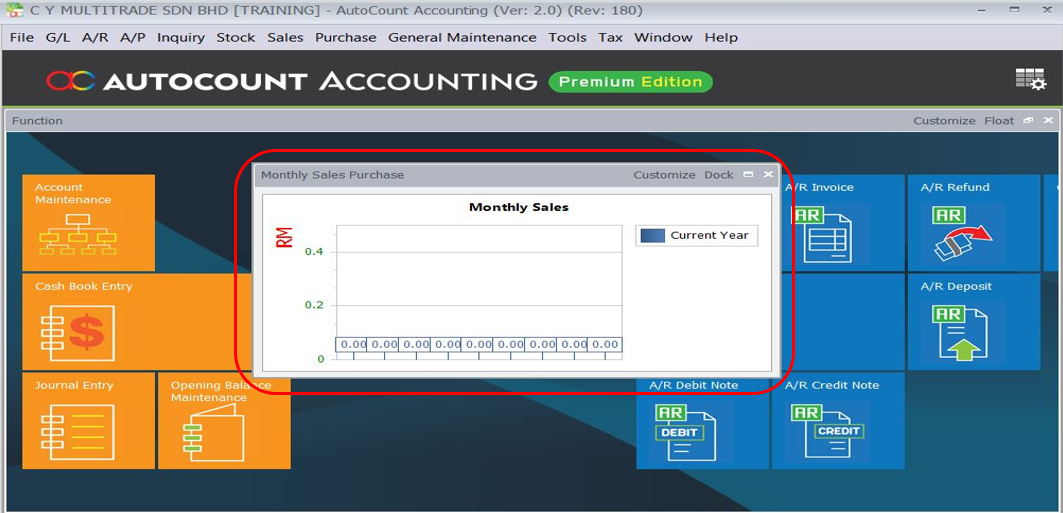
A new widget will appear at the home screen. User can place the widget in any area of the Home Screen or even resize it
There are several display settings available to work with the available Widgets on the Home Screen.
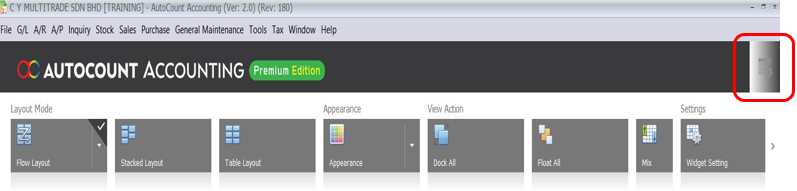
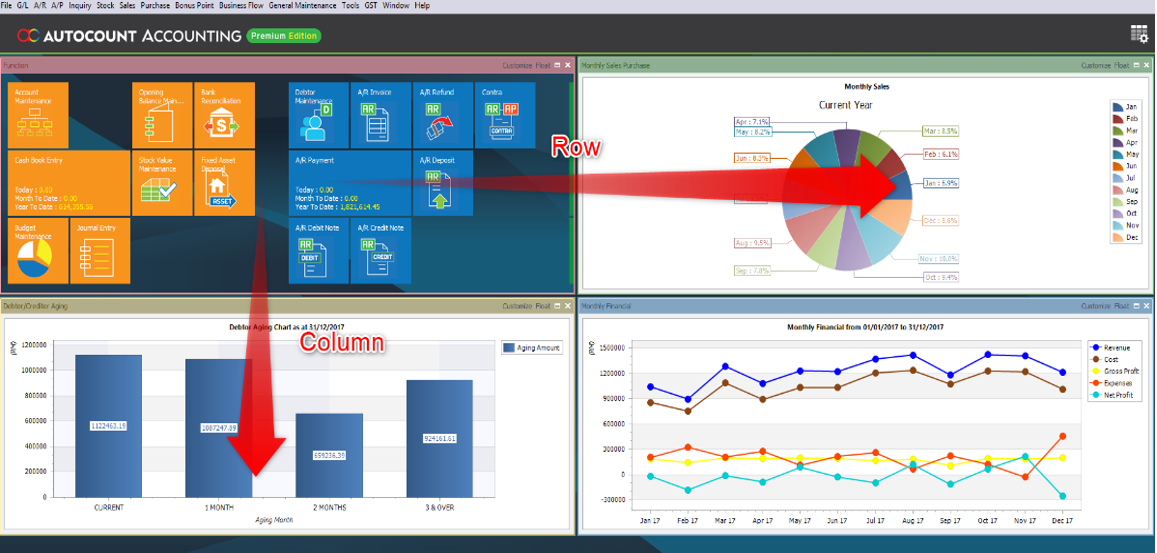
Layout Mode
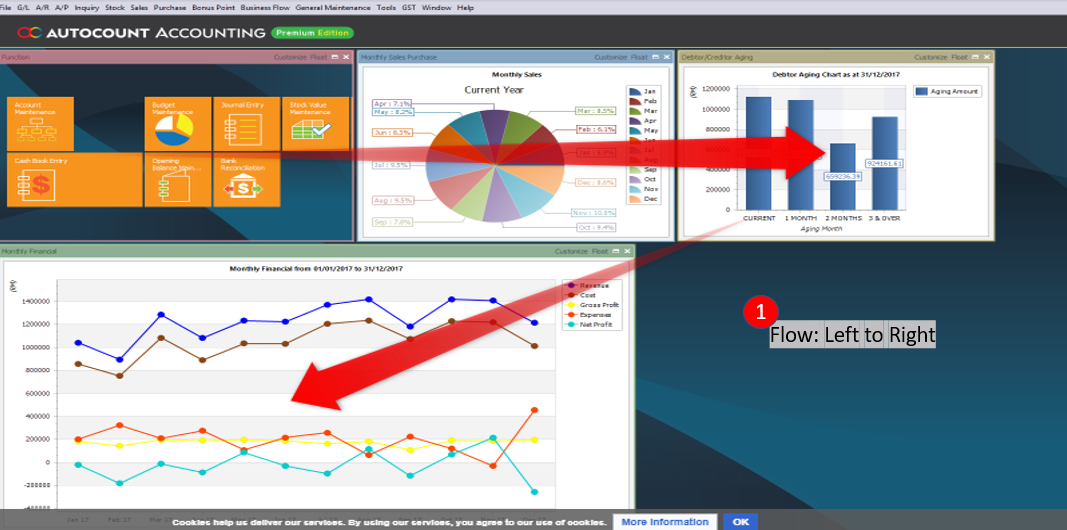
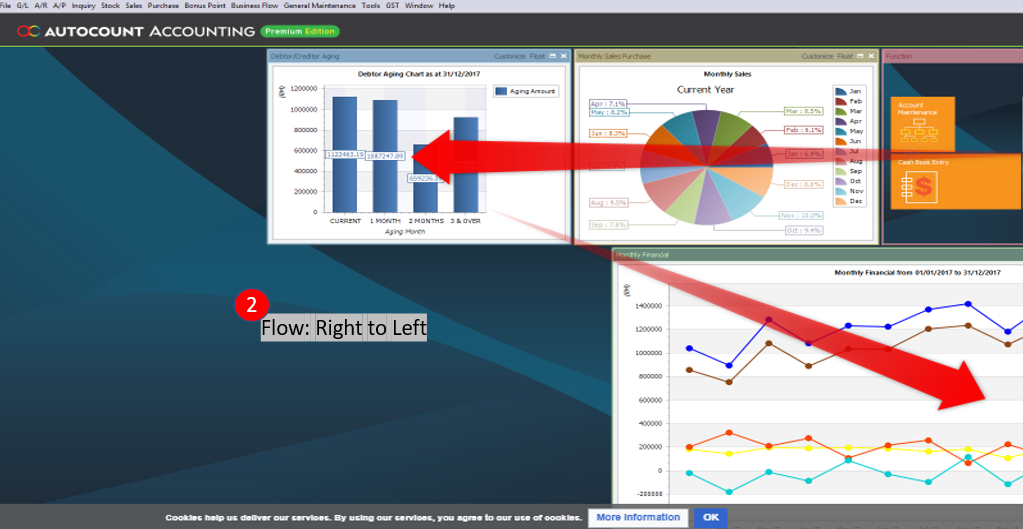
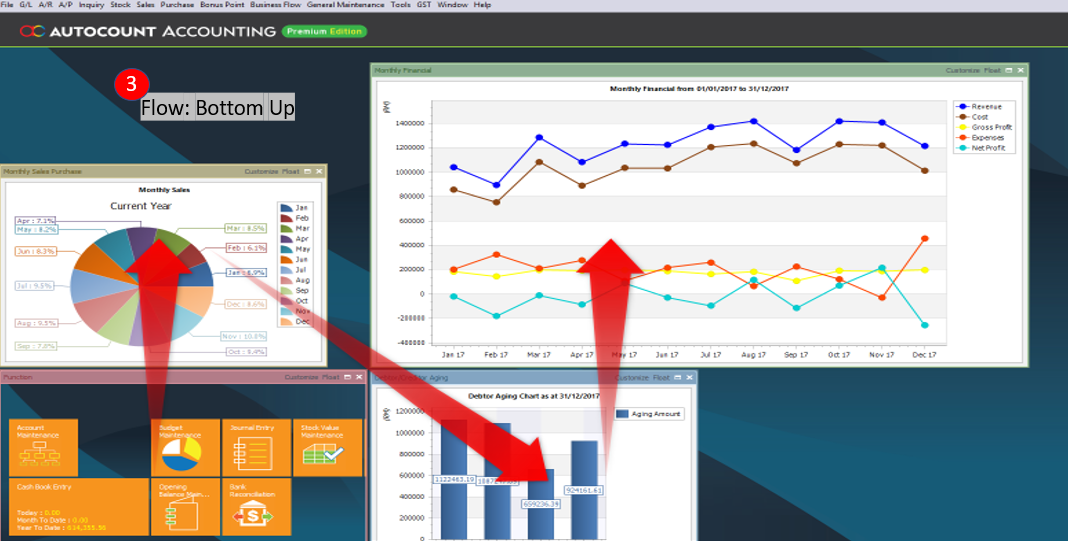
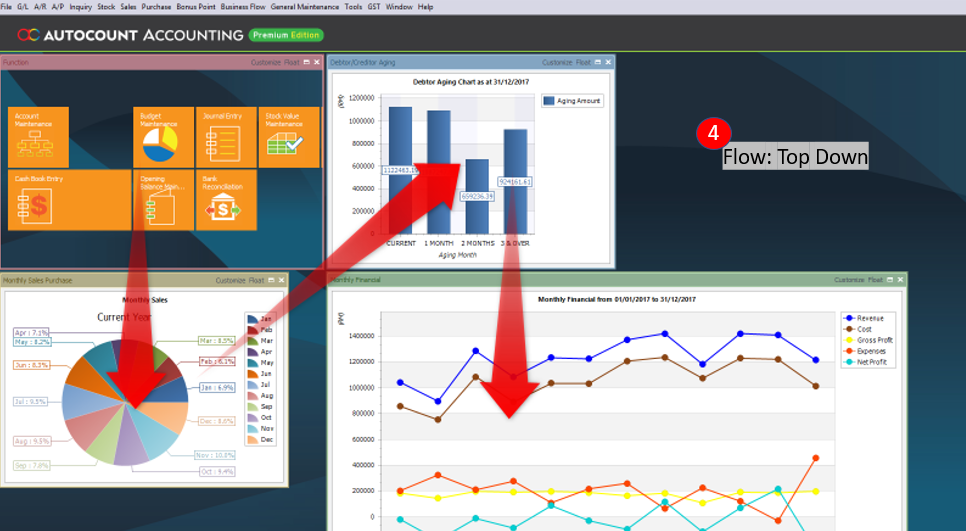
Flow Layout – Widget will be arranged in a flow pattern decided by user. Pattern available: Left to Right, Right to Left, Bottom Up and Bottom Down.
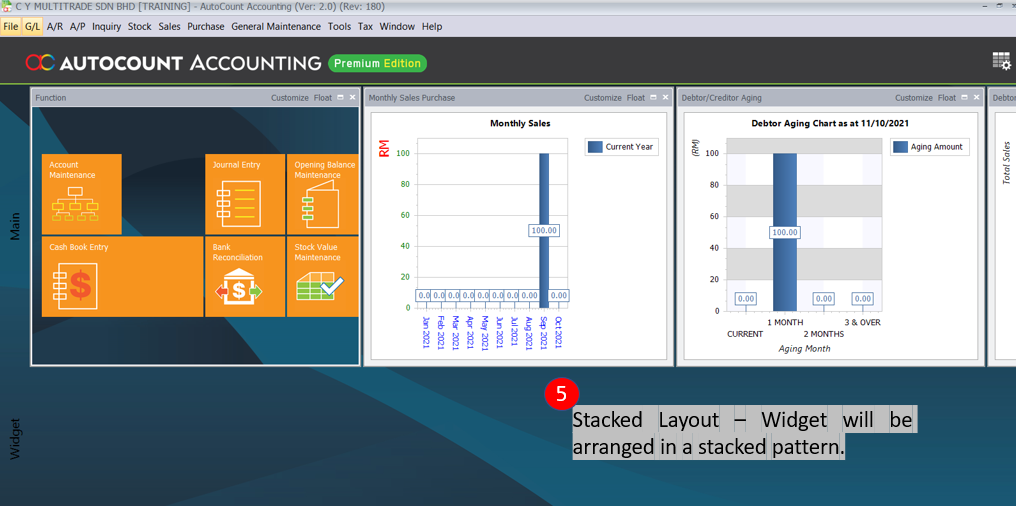
6. Table Layout – Widget will be arranged in a table pattern where the rows and columns size are prefixed. However, widget can consume more than 1 row or column space for better viewing and presentation.
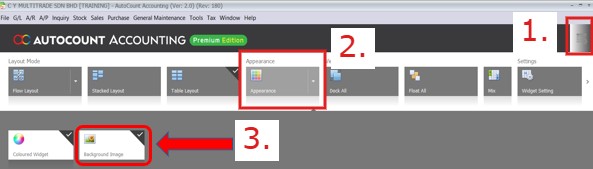
To use your own photo for the background, click the right top corner on main page (1) > Click Appearance (2) > Select Background Image and choose a photo from your device
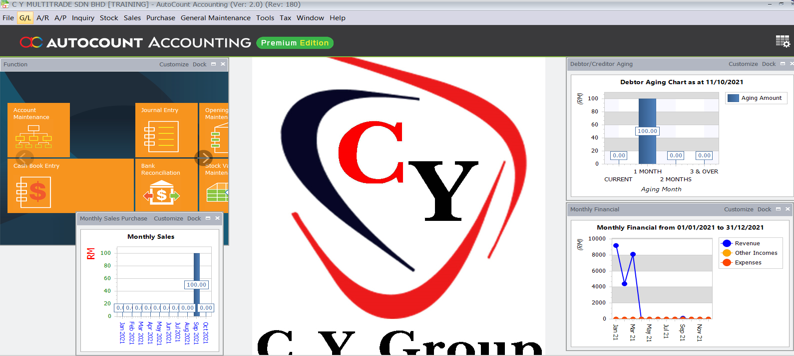
Result:
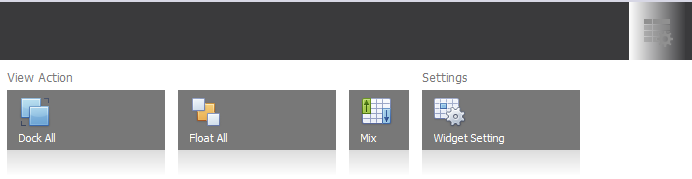
View Action:
1. Dock All – To arrange all widgets without overlapping against each other on the screen.
2. Float All – Widgets are free and not lock to specific pattern or arrangement. Can be moved across the screen as you like.
3. Mix – Click this to randomly arrange the widgets on the screen.
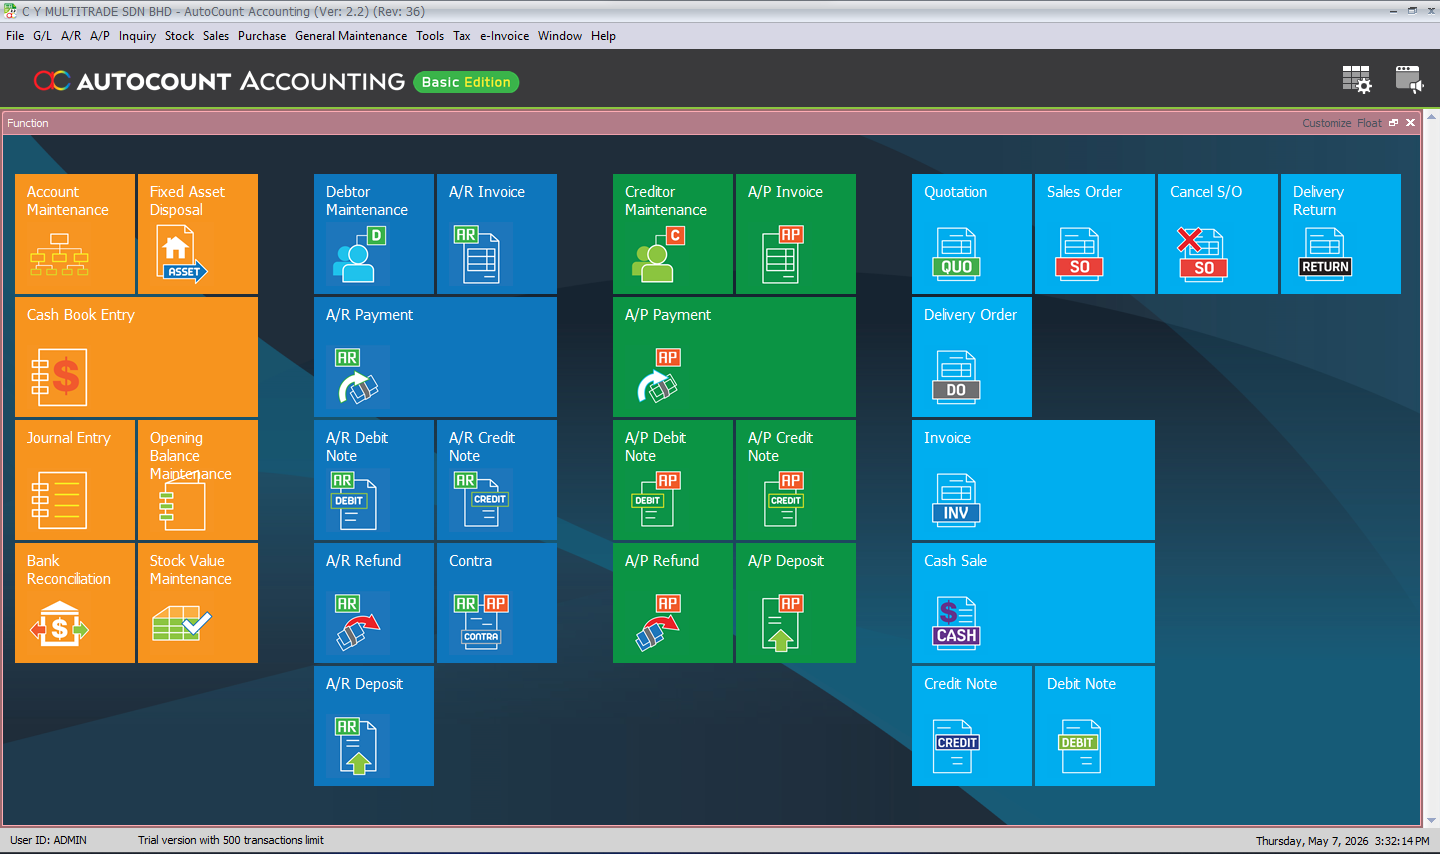
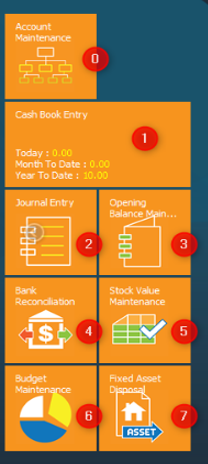
Customizing Function Widget:
The Function widget is the core widget in AutoCount used to display the tiles shortcut / icon that access to different common functions and entry in the system.
Tile Function:
1. Left Click: To create a new maintenance or transaction
2. Right Click: To access the current maintenance or transaction list
3. Magnifying Glass: To access the find dialog to search for maintenance or transactions
Click on the Customize button

1) Available Functions – Display the available functions.
2) Selected Functions – Display the selected or chosen functions to be displayed in home screen. Any functions that you wish to see in your home screen must appear in this section.
3) Functional Button 1:
- Select – To select available functions
- Deselect – To deselect selected functions
- Select All – To select all available functions
- Deselect All – To deselect all selected functions
4) Functional Button 2:
- Move up – To move function order up
- Move Down – To move function order down
- Create Group – To create a new group for highlighted function
- Merge with Previous Group – To merge with previous group for highlighted function
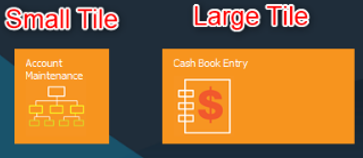
5) Tile Size – Set tile size between small, medium or large
6) Reset to Default – To reset everything
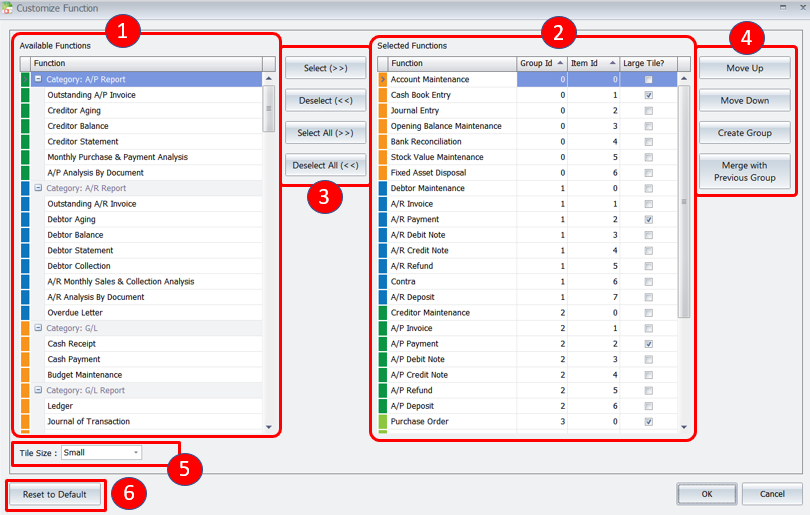
Group – Display the current grouping of the function. Grouping starts from left to right, starting from Group ID 0.
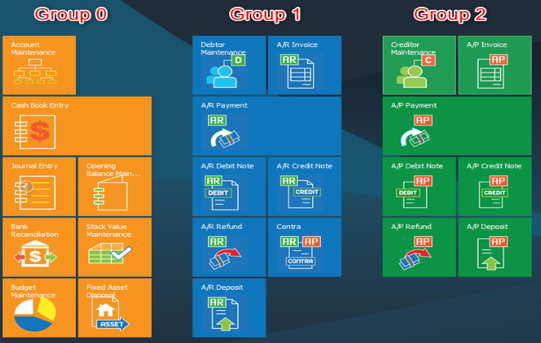
Item Order – Display the order of function. Tiles order starts from top to bottom, starting from Order ID 0.
Large Tile? – Check to display the function in larger tile
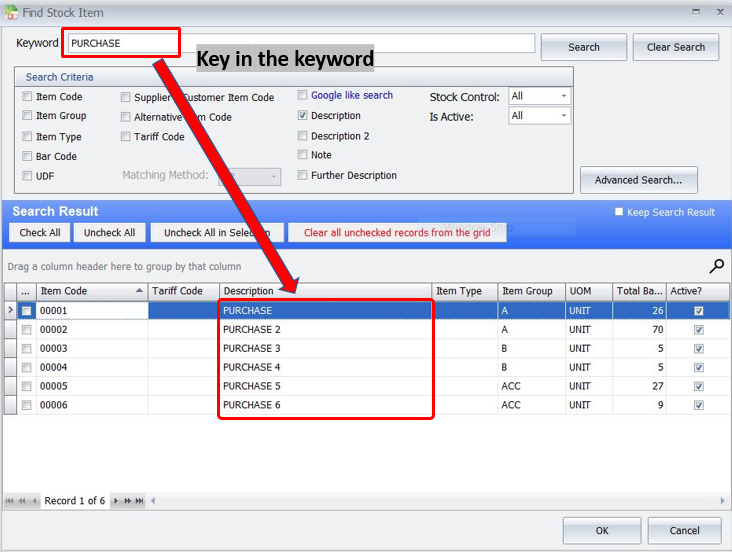
3.4 Lookup Search
Go to Tools > Options

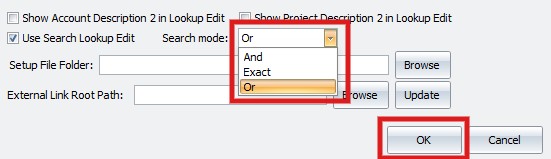
User can now change the searching mode for Search Lookup Edit. User can change this from Menu → Tools → Options → Under General → Application Setting. There should be a “Search Mode” option which user can change the mode if “User Search Lookup Edit” is enabled .
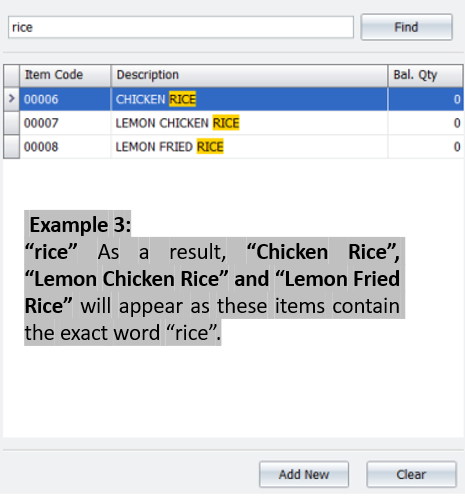
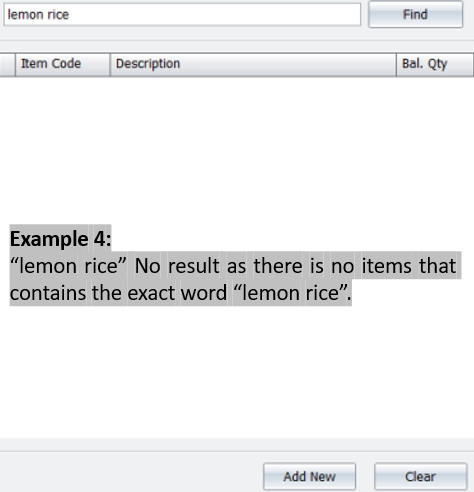
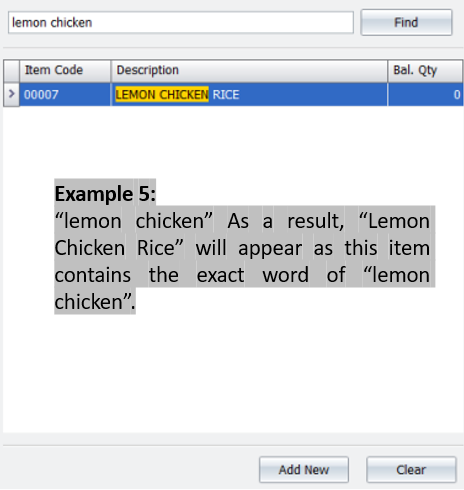
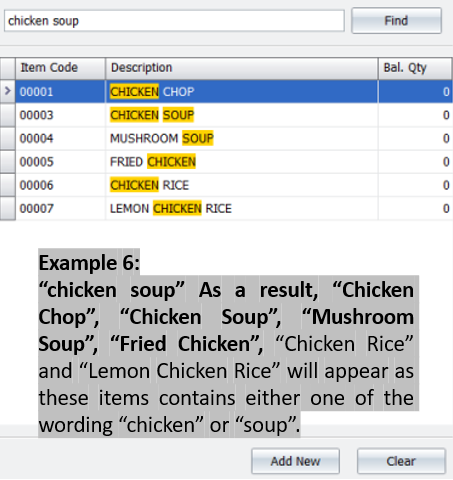
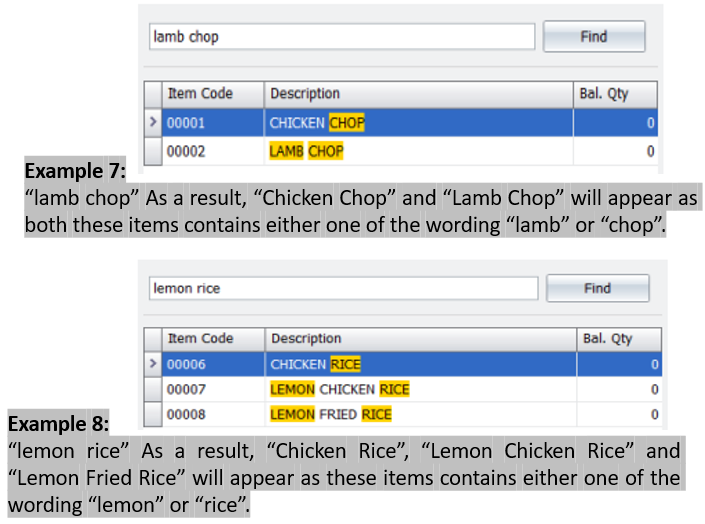
Currently there are 3 different modes supported: “AND”, “EXACT” and “OR”.

To change the search mode, click on the drop down menu button and select which you want to apply, then click OK to save
Assuming the system had a list of items:
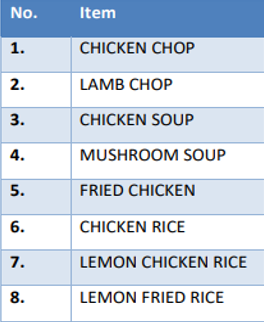
Search Mode: AND
In AND search mode, the system only shows results that contain all the keywords entered.
Each word is treated separately.
Example:
- Search: “chicken chop” → only items containing both “chicken” and “chop” will appear.
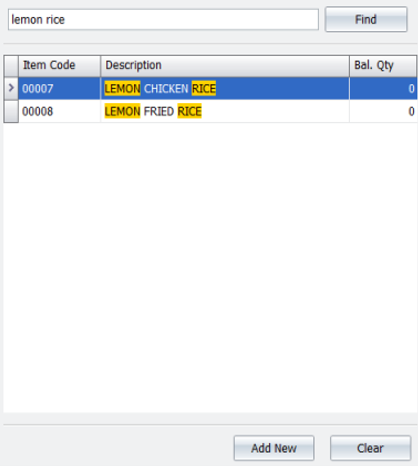
- Search: “lemon rice” → only items containing both “lemon” and “rice” will appear.
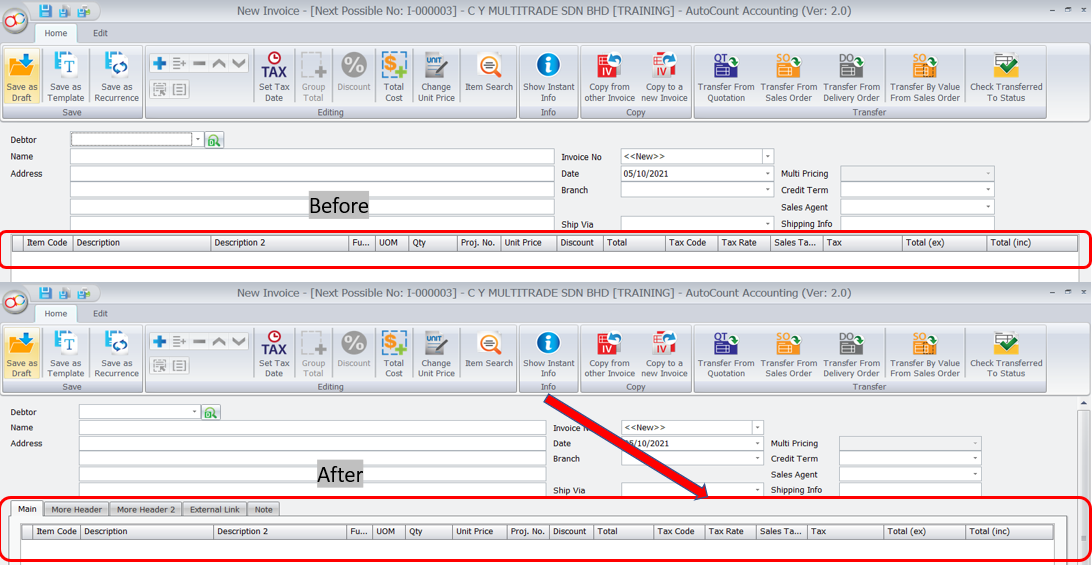
3.5 Customized Layout
- This function allow to customize the overall interface layout
- User had the flexibility to design their own layout to place and show specific field based ont their preference
- Currently only supported in Sales, Purchase transaction and Stock Item Inquiry
- Can save in Layout Manager similar to Column Chooser function
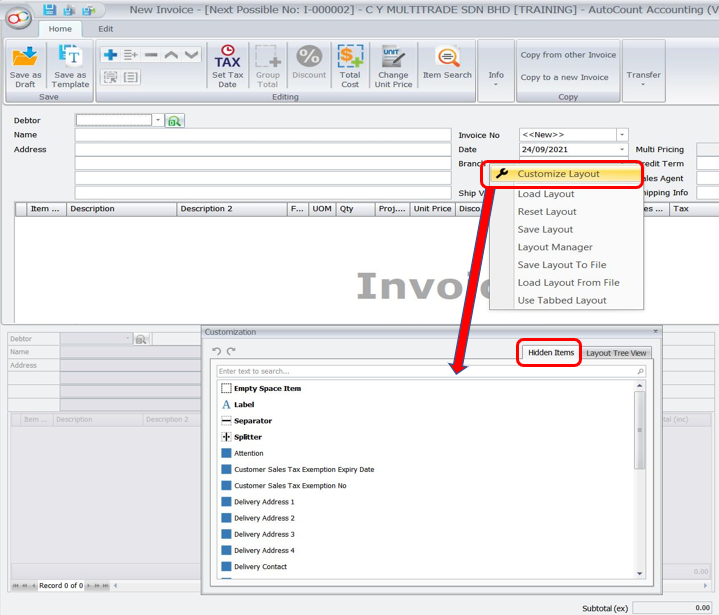
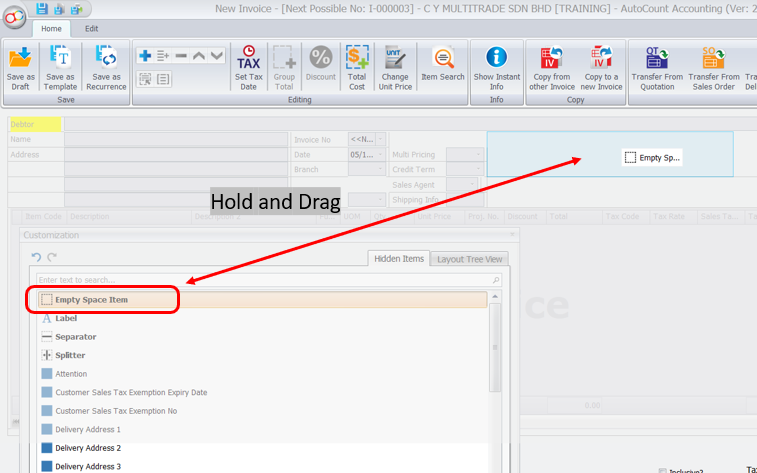
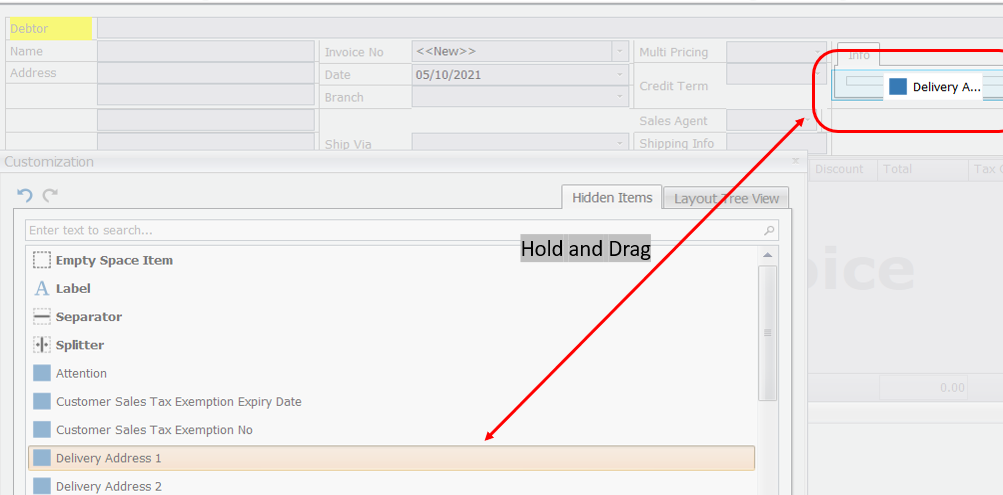
First, Right Click on the empty space
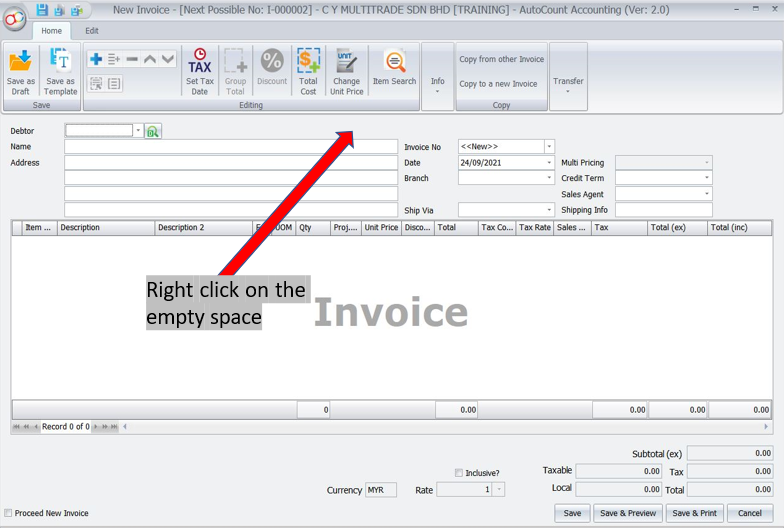
Then the Customization function will prompt out and the Layout is ready to be designed
Hidden Item:
- Those item under this column is yet to be displayed
- You can pull and drag any one of these out to customize your layout
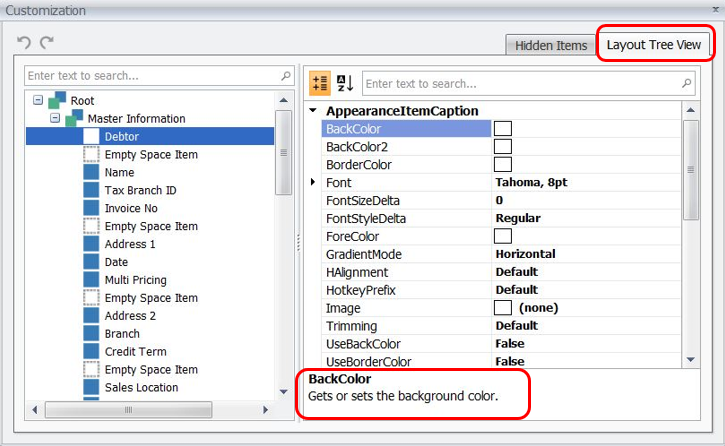
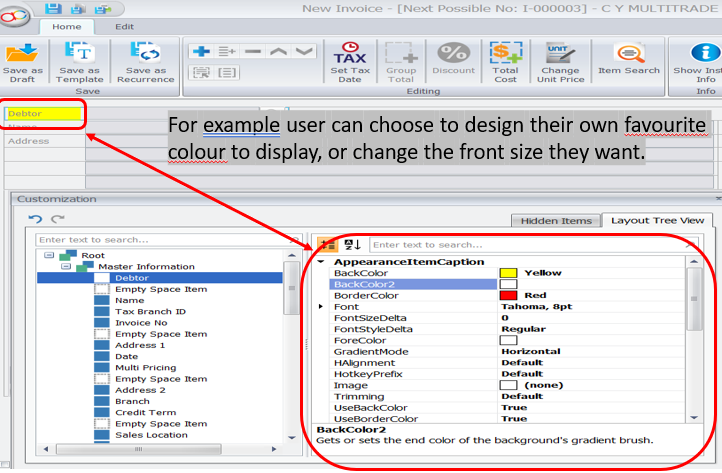
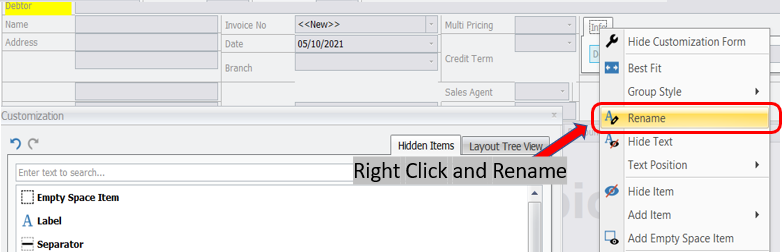
These are more functions (with explanation) for customization in the Layout Tree View such as Appearance Item Caption, Control Option, Options Flow Layout Item, and also Text.
These functions allow user to edit their displayed column based on their will.
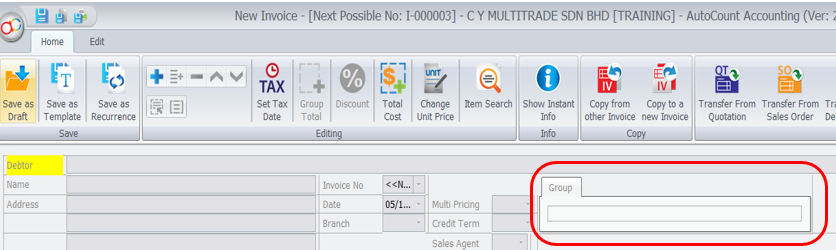
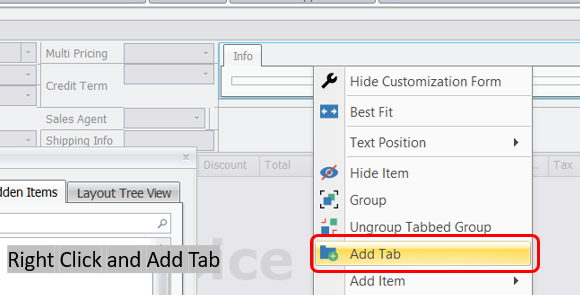
Other than customization function for detau items, user can aslo right click again for the whole layout design. More functions are performed for user to design (after the whole screen design)
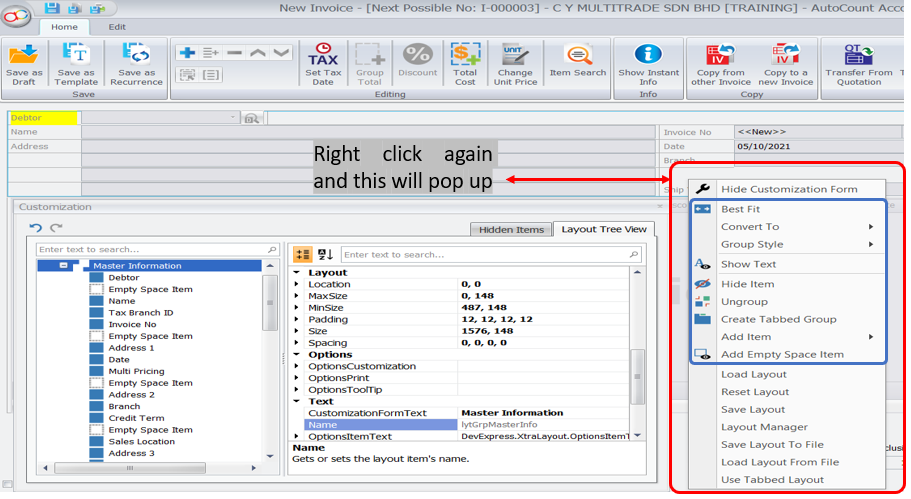
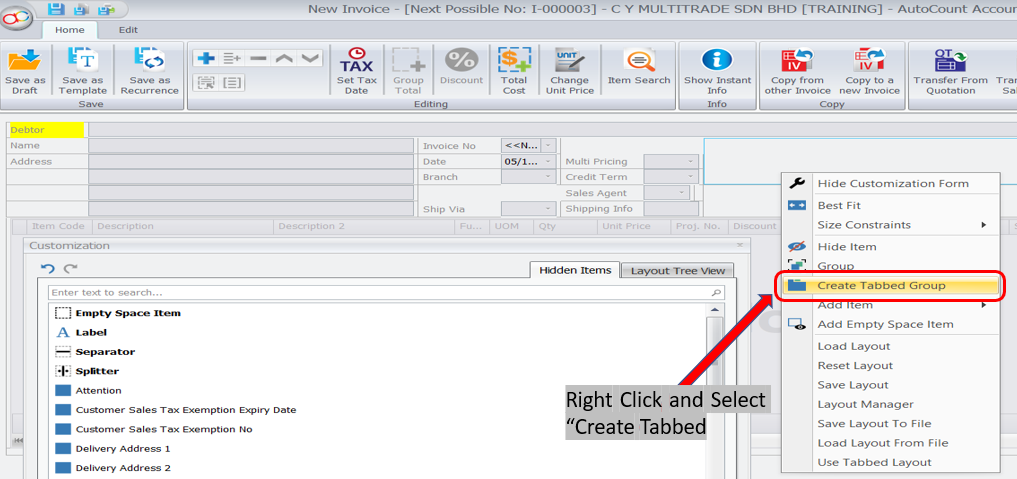
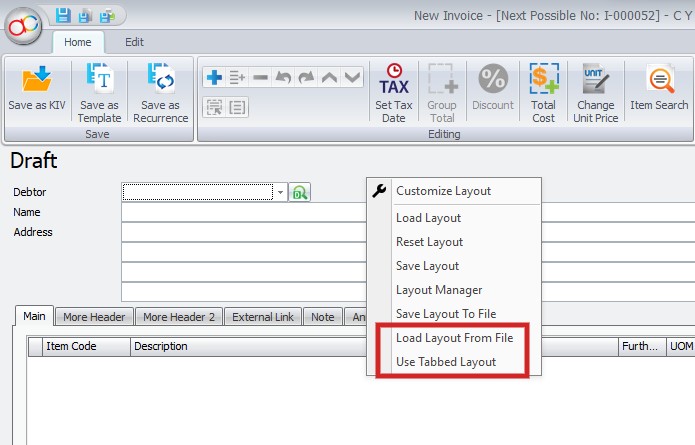
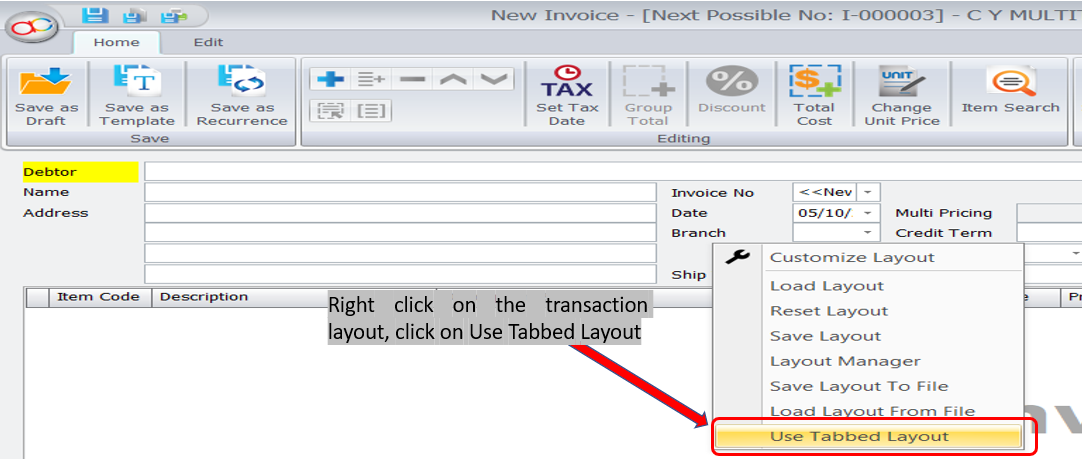
For those users who already get used to previous AutoCount Accounting Version 1.9, can choose the ‘Use Tabbed Layout’ function
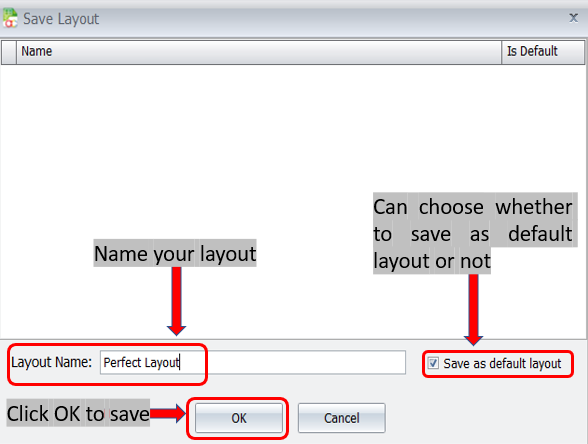
Click on Save Layout to name and save the current designed layout, users can choose to set it to be default layout also.
Click Reset Layout if you want to use back system default layout
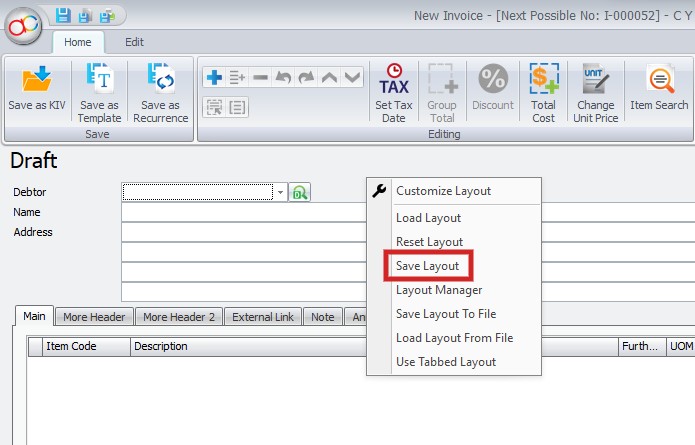
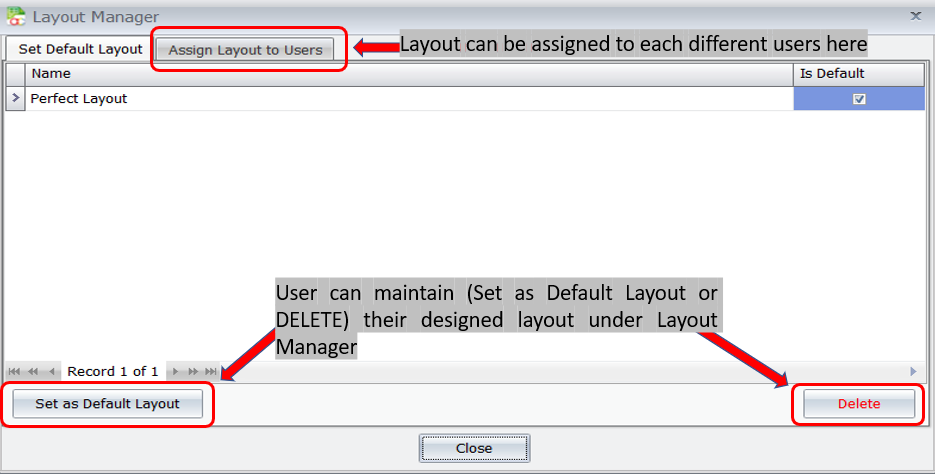
The layout saved before will be stored in the database. You can design as many as you wanted and click on the Load Layout to load any layouts that were saved before
For layout Customization, Autocount Accounting V2 added in “Save Layout To File” and “Load Layout from File” like what users can do for report design
Users can save any layout their designed and load into another account book if they want