Chapter 1 – Manage Account Book
Chapter 1.5 – License Setting
Setting up new AutoCount Server
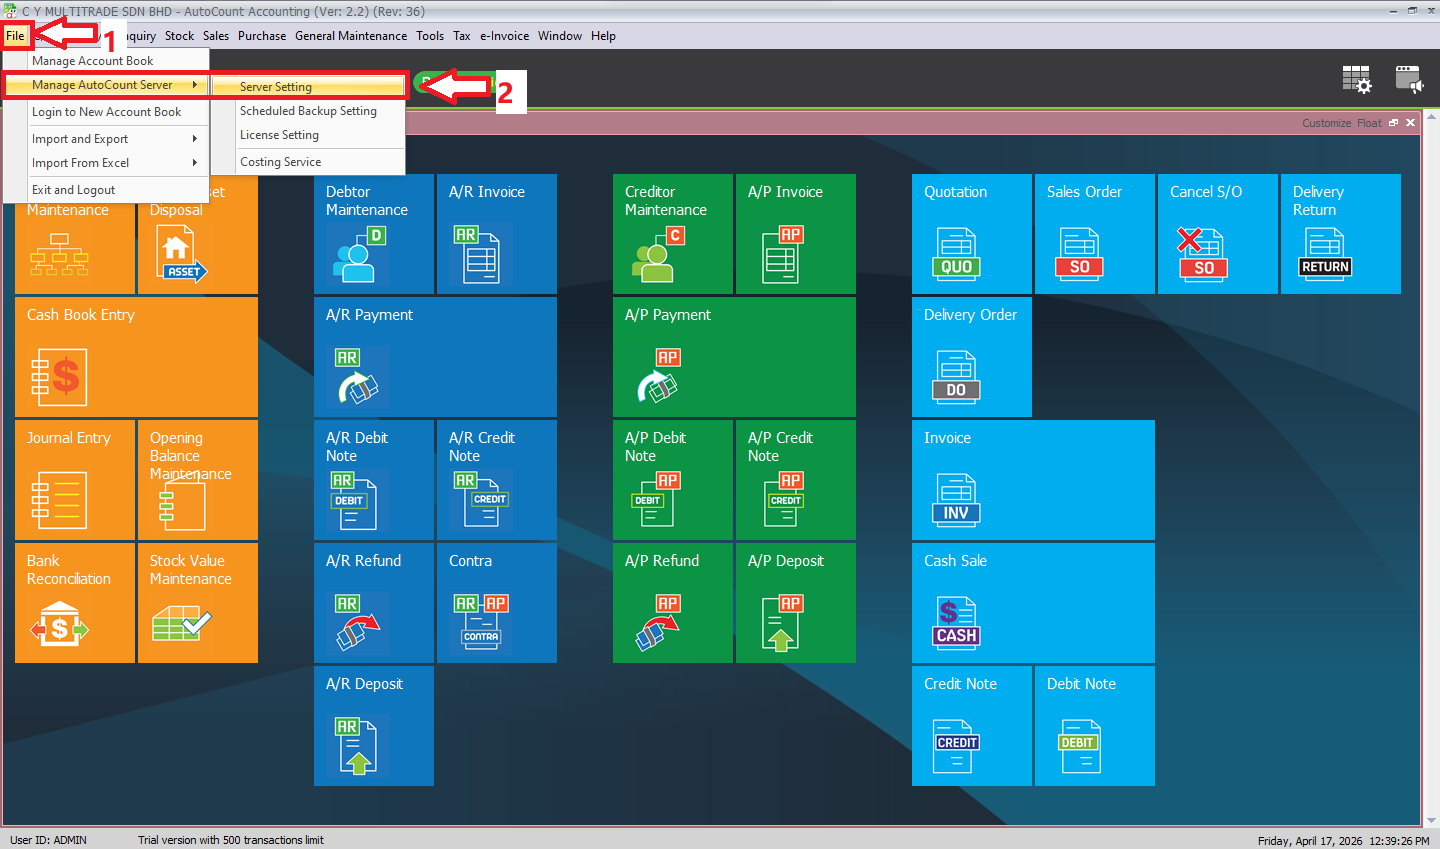
After installing AutoCount Server 2.2, you will need to setup by configuring some settings.
1. Click “File”
2. Click “Manage AutoCount Server” > “Server Setting”
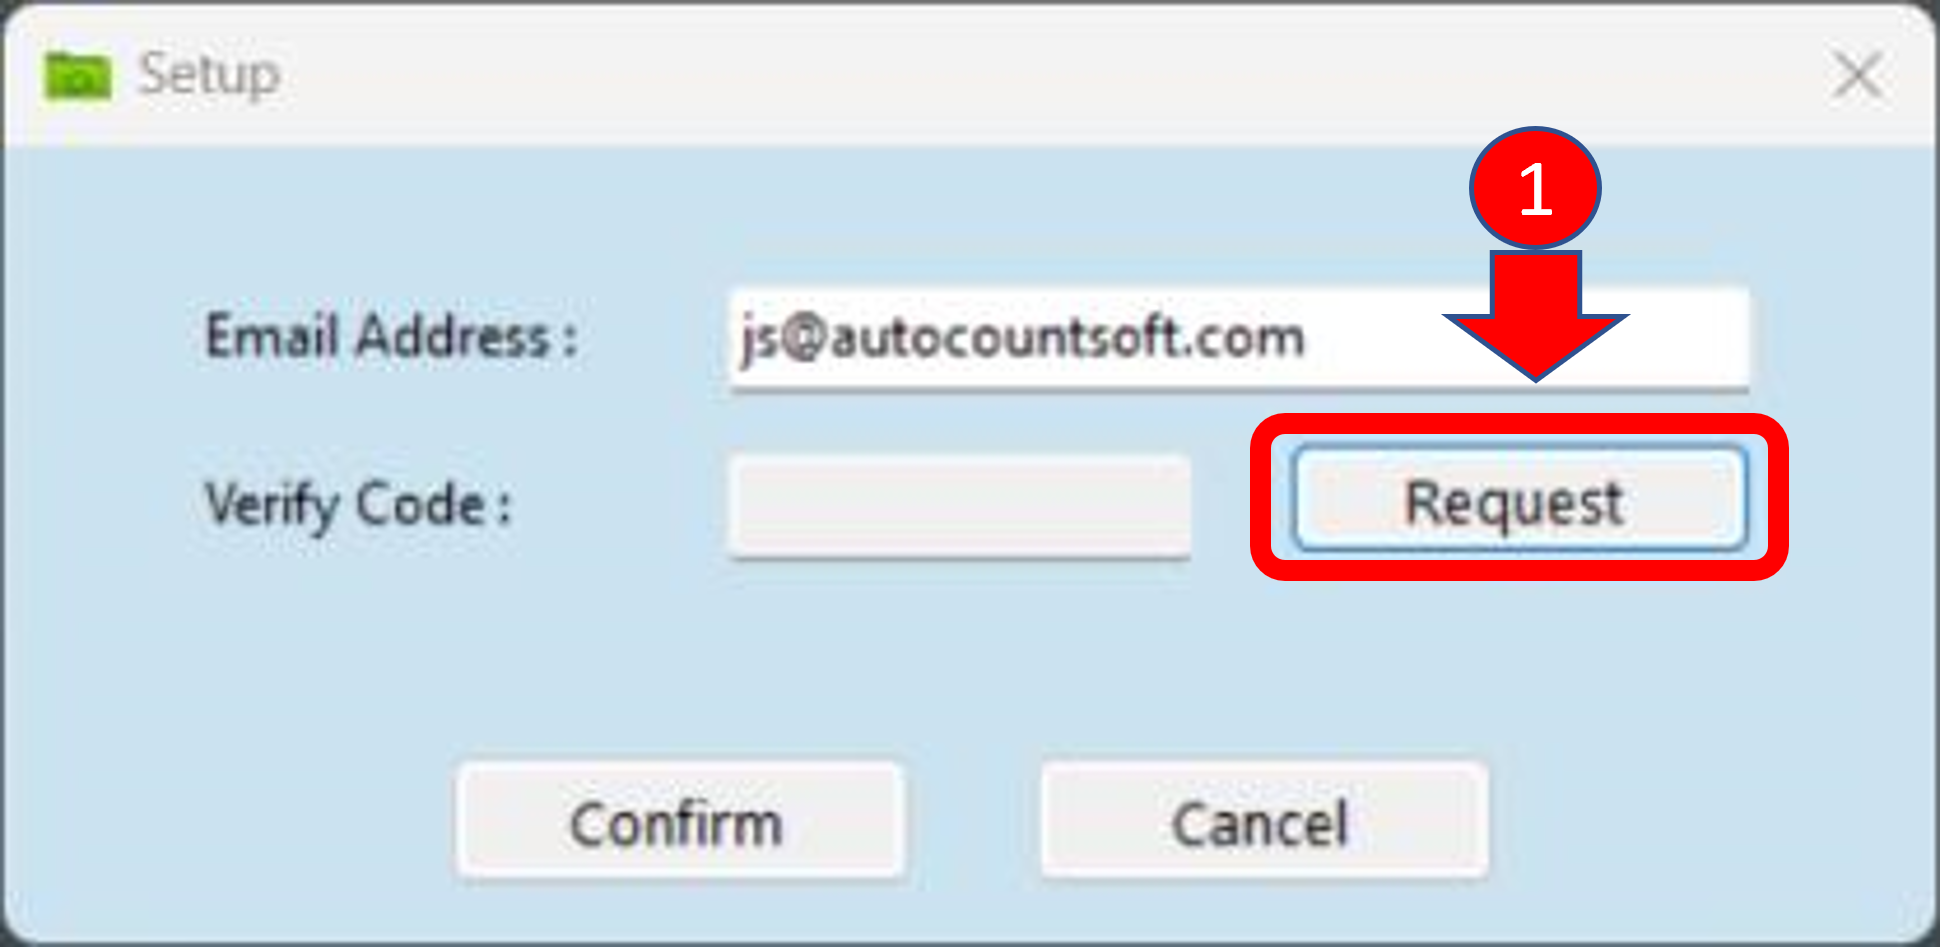
Key In your email address and click “Request”
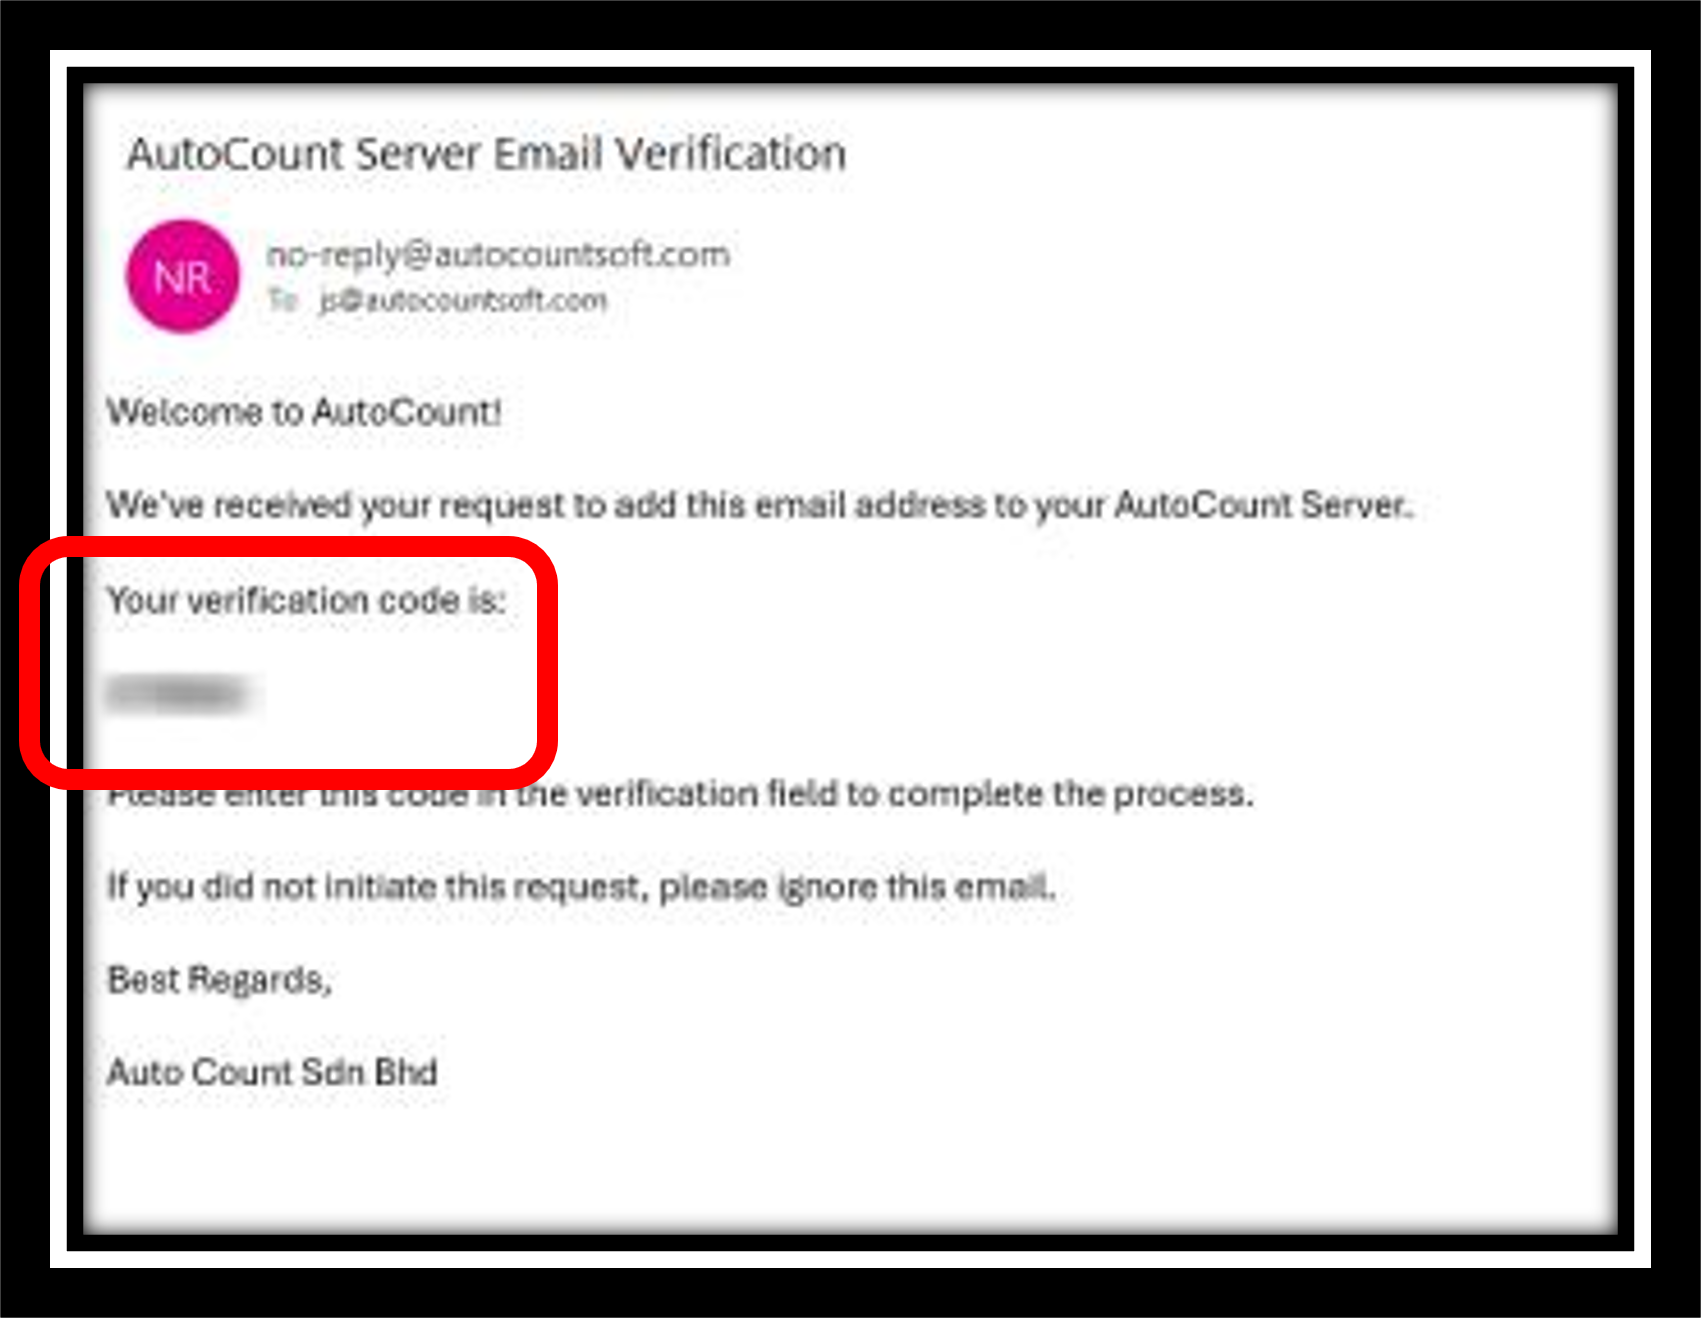
You will receive an email for the verification code
Key in the verification and click “Confirm”

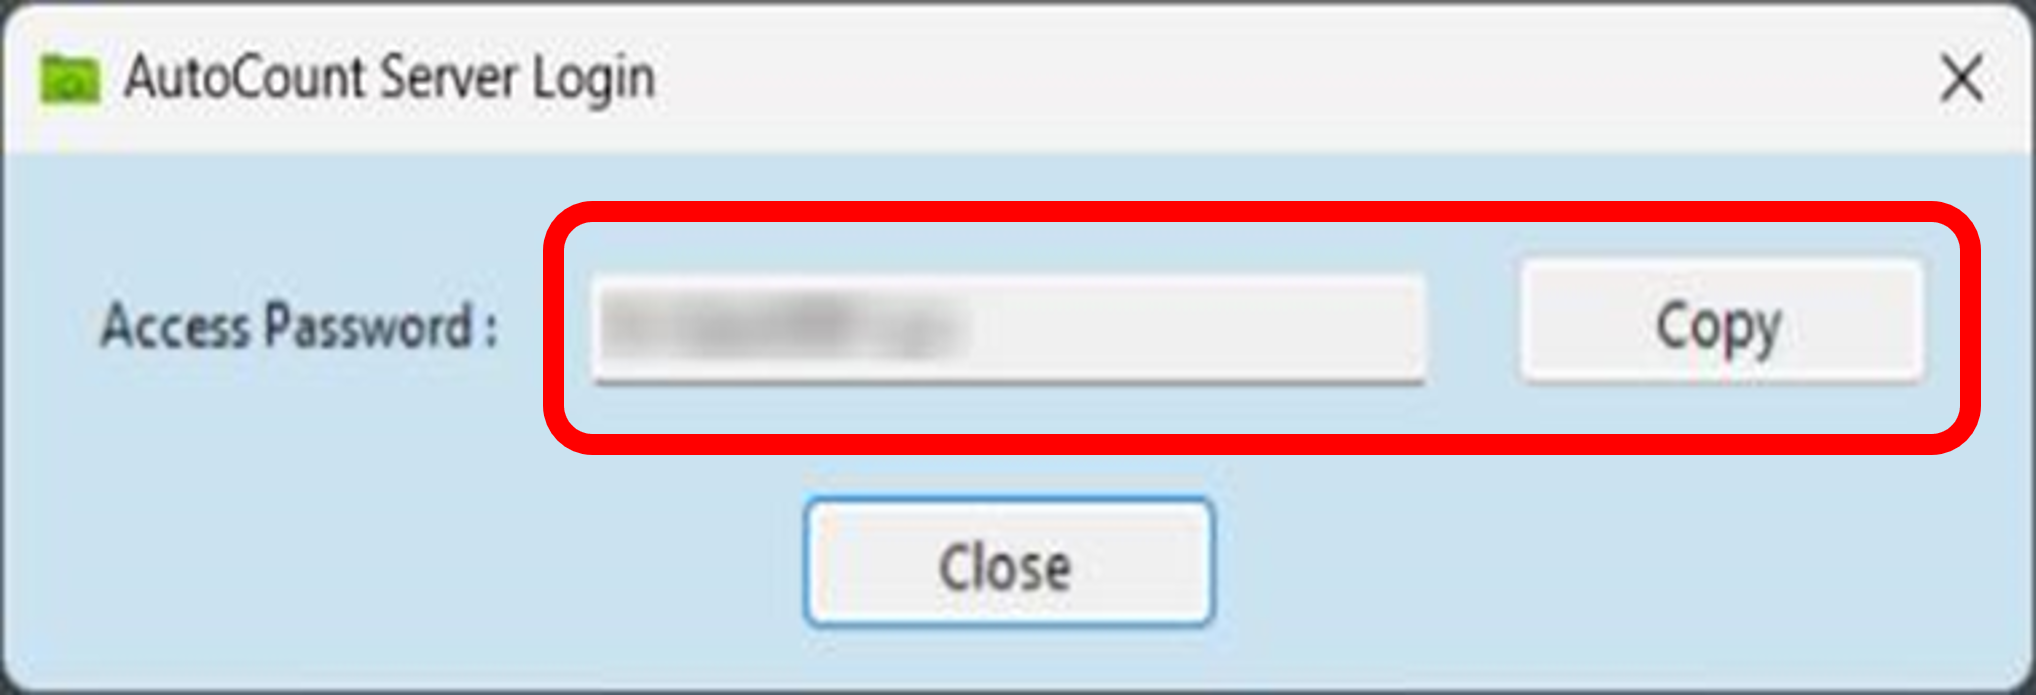
A password will be provided. Kindly copy this password and save it as this password will be required in future to perform any changes of setting in AutoCount Server. Click “Close” to proceed after copy.
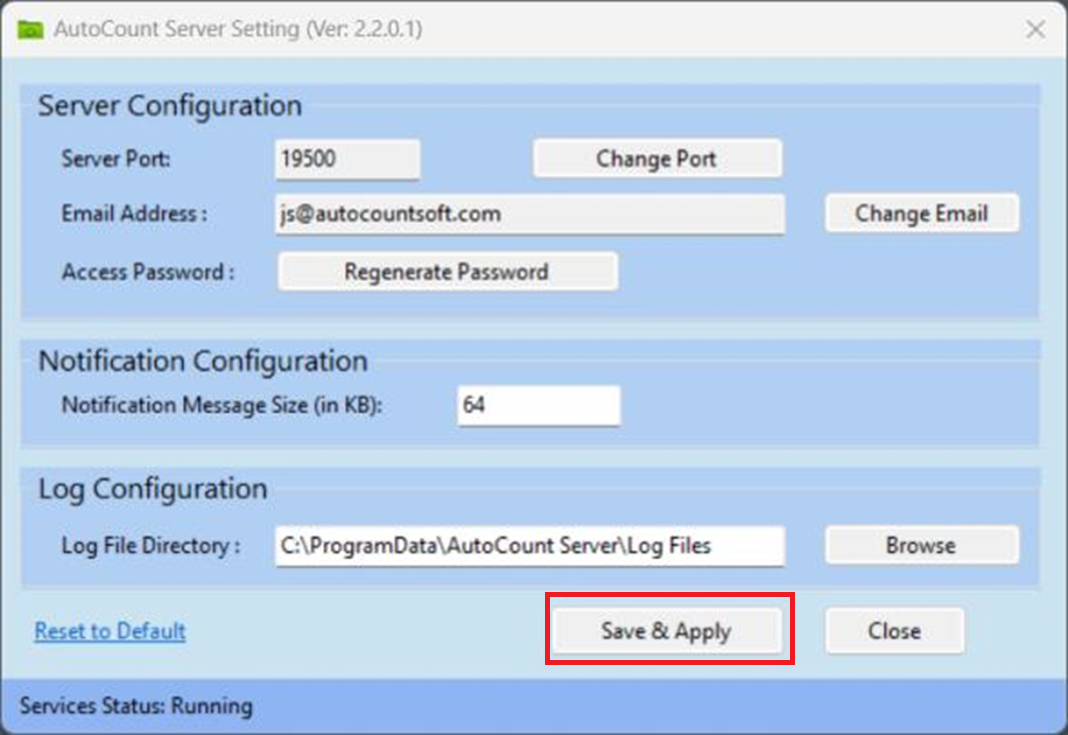
AutoCount Server Setting dialog will appear. You can set your setting in this dialog.
After setting your setting, click “Save & Apply”
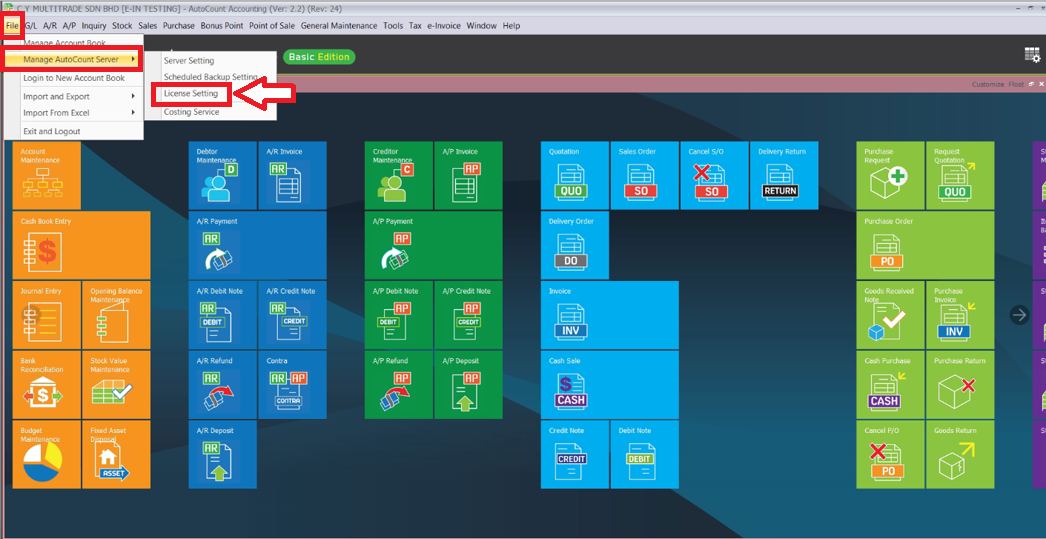
Login into AutoCount Accounting 2.2 > File Menu > Manage AutoCount Server > License Setting
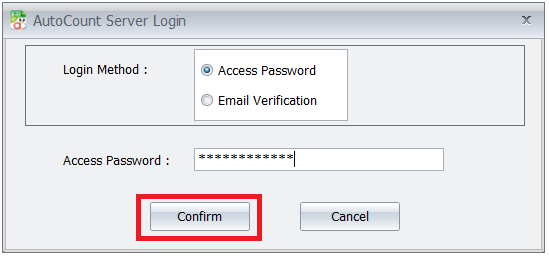
A login will prompt. Key in access password and click “Confirm”
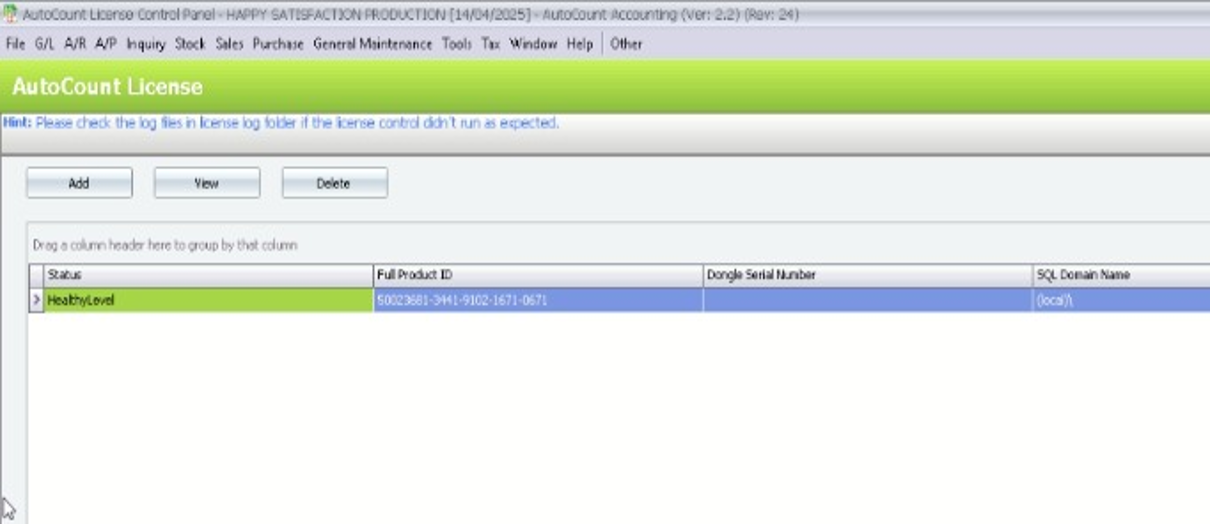
AutoCount License page will appear. You can Add, View or Delete your Product ID from this function.